Rancher — A Step Ahead
Deep Dive into Rancher Features.
In my previous post, I walked you through the basics concept of Rancher , what it is and how to setup rancher for different cloud providers. Even importing a cluster.
Now in this section, we will go through the features and functionalities that you can do after having a cluster setup in Rancher.
Just for a quick heads up, we will quickly install Rancher Server \ and import that cluster via Rancher Dashboard and we will do it with play with kubernetes. So with this you can even practice while reading.
Setting Up 3 node Kubernetes cluster:
Step1: Launching a 3 node Kubernetes Cluster using the kubernetes playground -visit https://labs.play-with-k8s.com and start a session.
- Click add a new instance and follow the steps mentioned
kubeadm init --apiserver-advertise-address $(hostname -i)
#above command initialises the current machine as master and gives you the token to have it
#add two new Instances and then run the join command
kubeadm join 192.168.0.13:6443 --token <token> --discovery-token-ca-cert-hash <hash>
#After that initialise cluster networking to the master so that the nodes come in ready state
kubectl apply -n kube-system -f \
    "[https://cloud.weave.works/k8s/net?k8s-version=$(kubectl](https://cloud.weave.works/k8s/net?k8s-version=$(kubectl) version | base64 |tr -d '\n')"
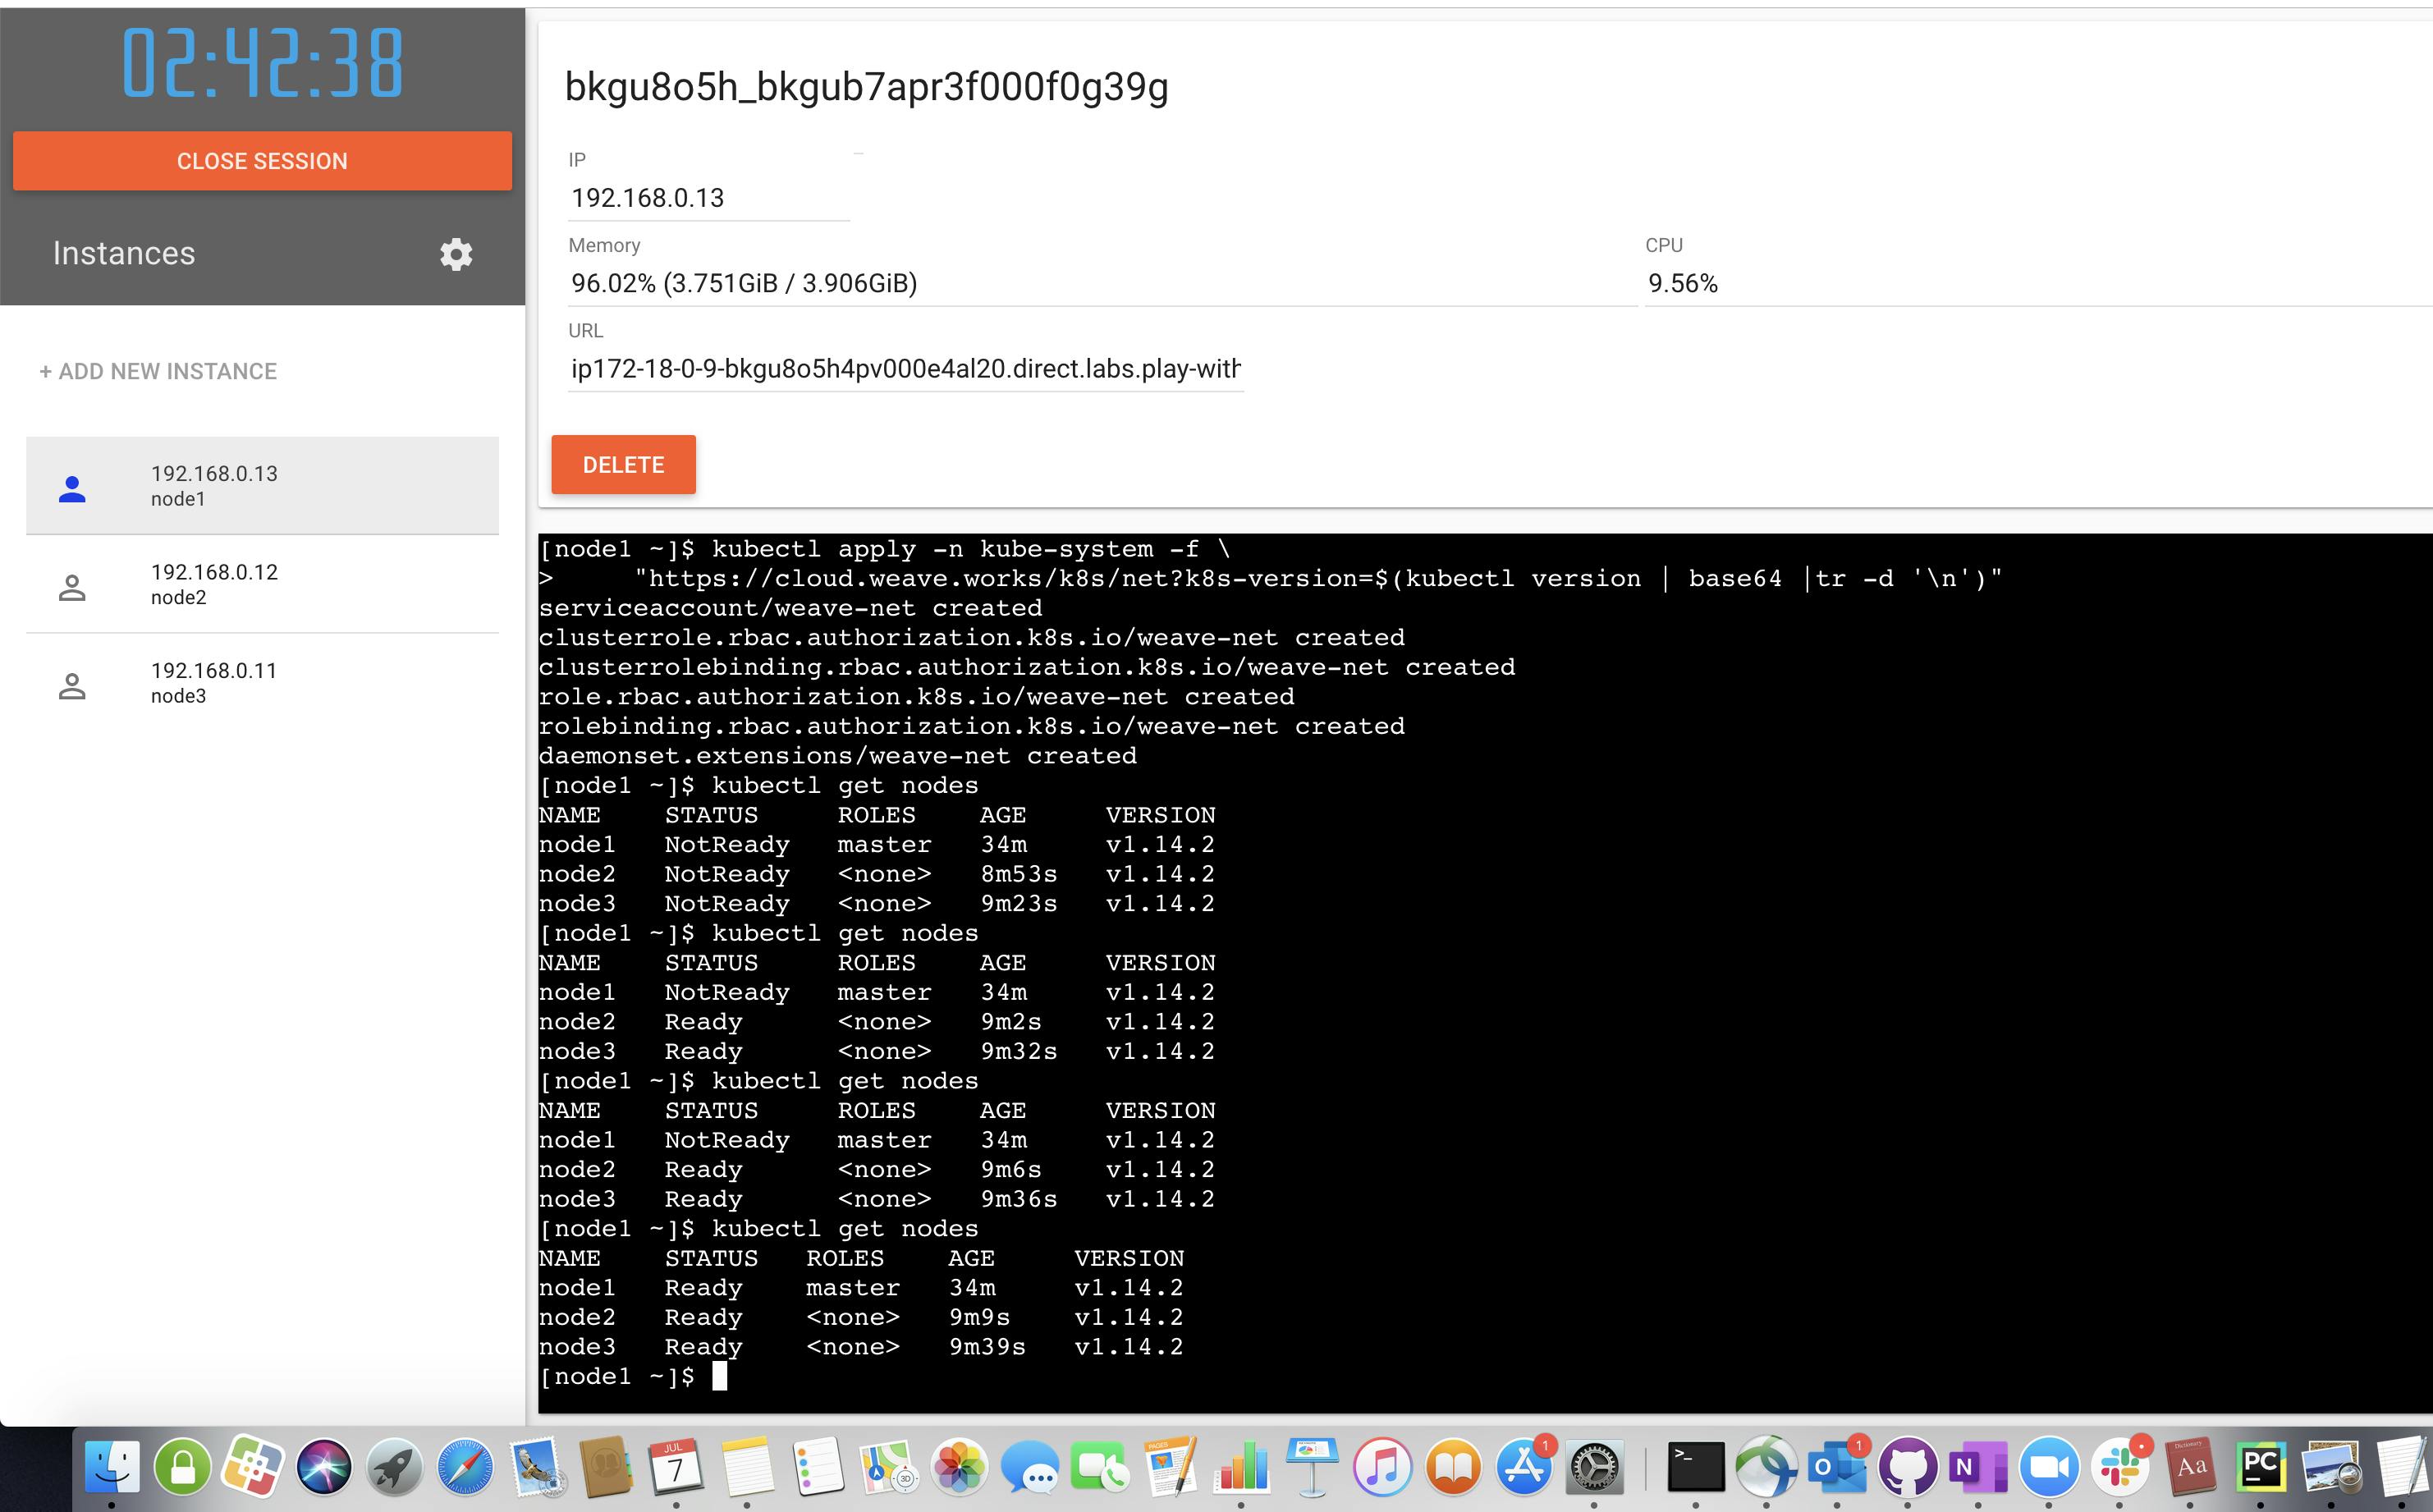 Kubernetes 3 node cluster is all set
Step2 : Installing Rancher Server Installing rancher is pretty simple using a simple docker command. Make sure to pass environment variables for proxied if you have.
docker run -d --restart=unless-stopped \
-p 80:80 -p 443:443 \
rancher/rancher:latest
Or you can also run it as a pod in Kubernetes.
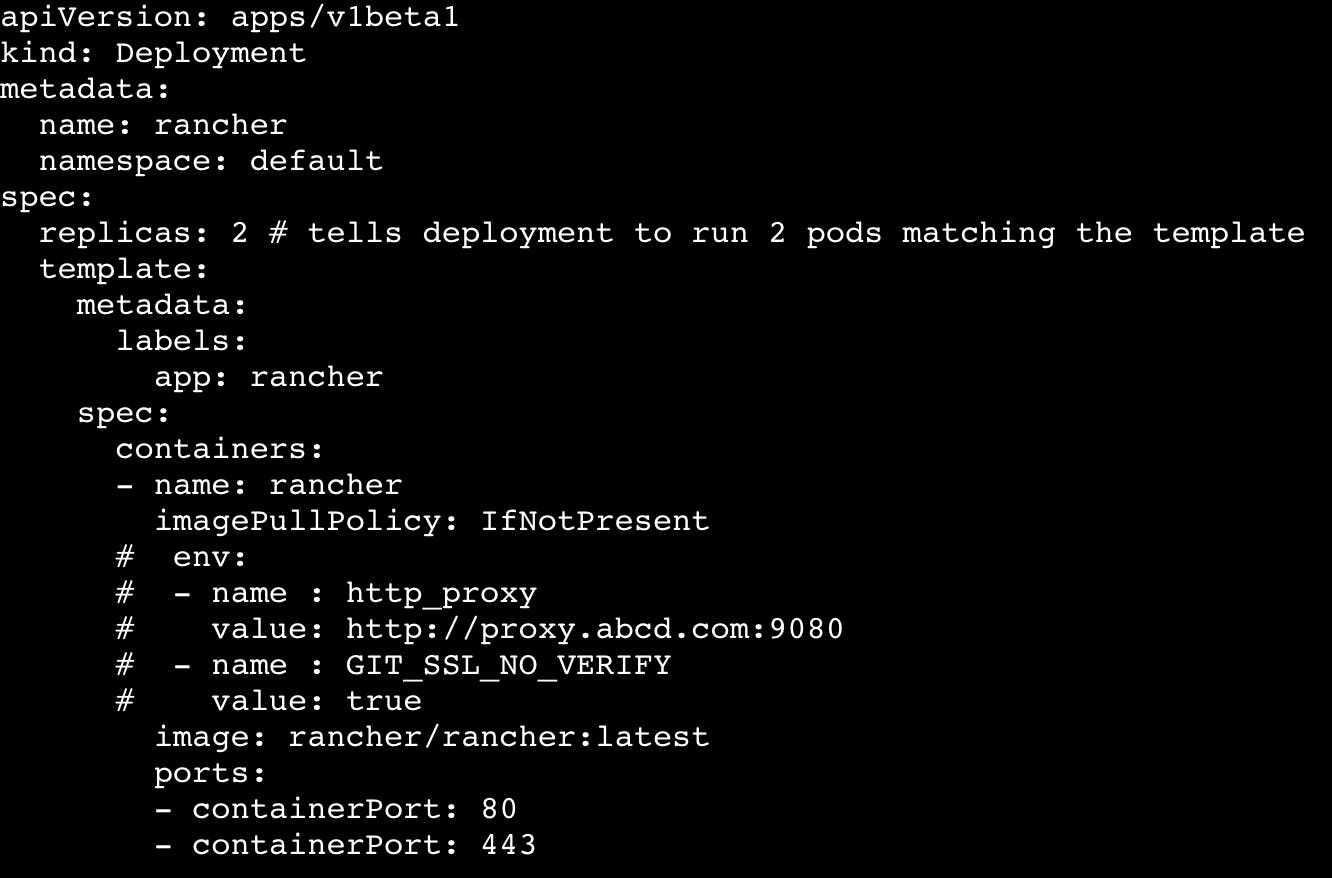
Once you have rancher installed you can go to {{server_ip}} and see rancher running or if you have exposed it as a service in kubernetes then you can go to the node_ip:nodeport. And in the cluster you would see the cluster agent and node agent. Cluster agent is your rancher server and node agent is a daemon set running on every node.

Importing a cluster created in Rancher server:
Now that you have created a 3 node kubernetes cluster and installed rancher server, its time to import that cluster in rancher and see what all things you can actually do with it.
Step1: After logging into rancher server click on create cluster, select import and provide a name for the cluster.

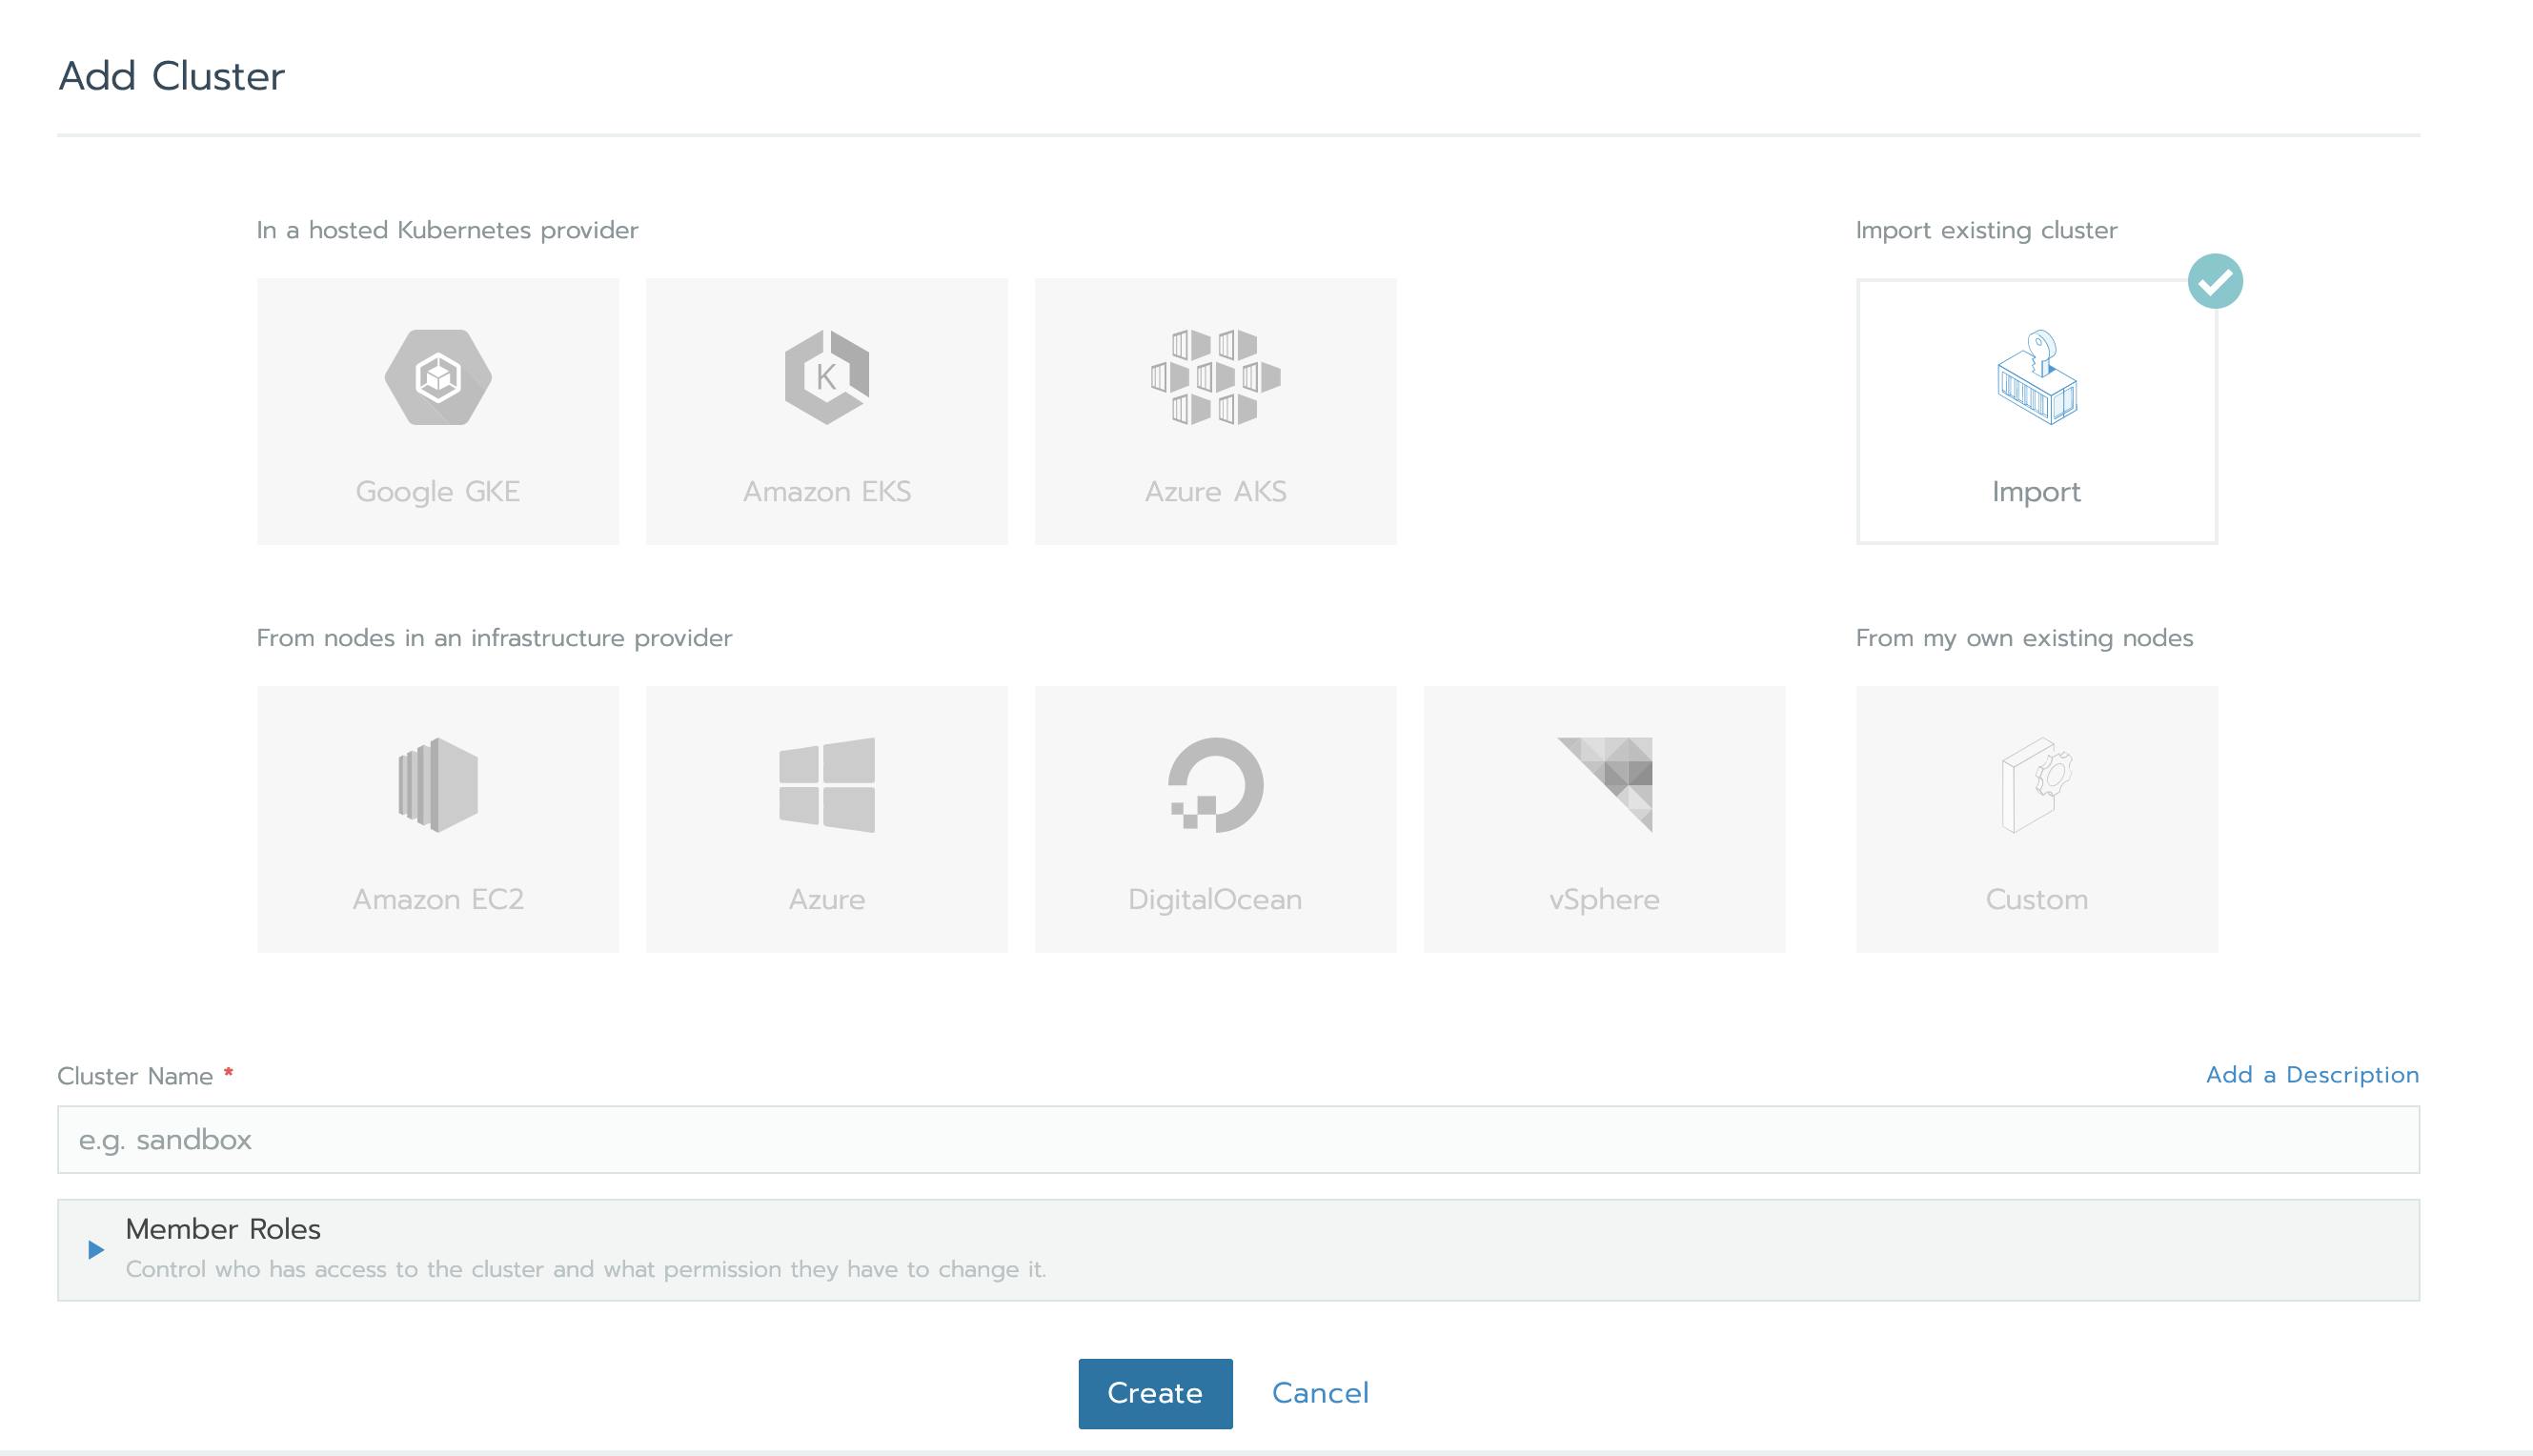 Select import option as we already have a kubernetes cluster
Step2: Once you click create you will be given a curl command which is nothing but a yaml file for deploying rancher components onto the existing kubernetes cluster in order to make it available on rancher server.
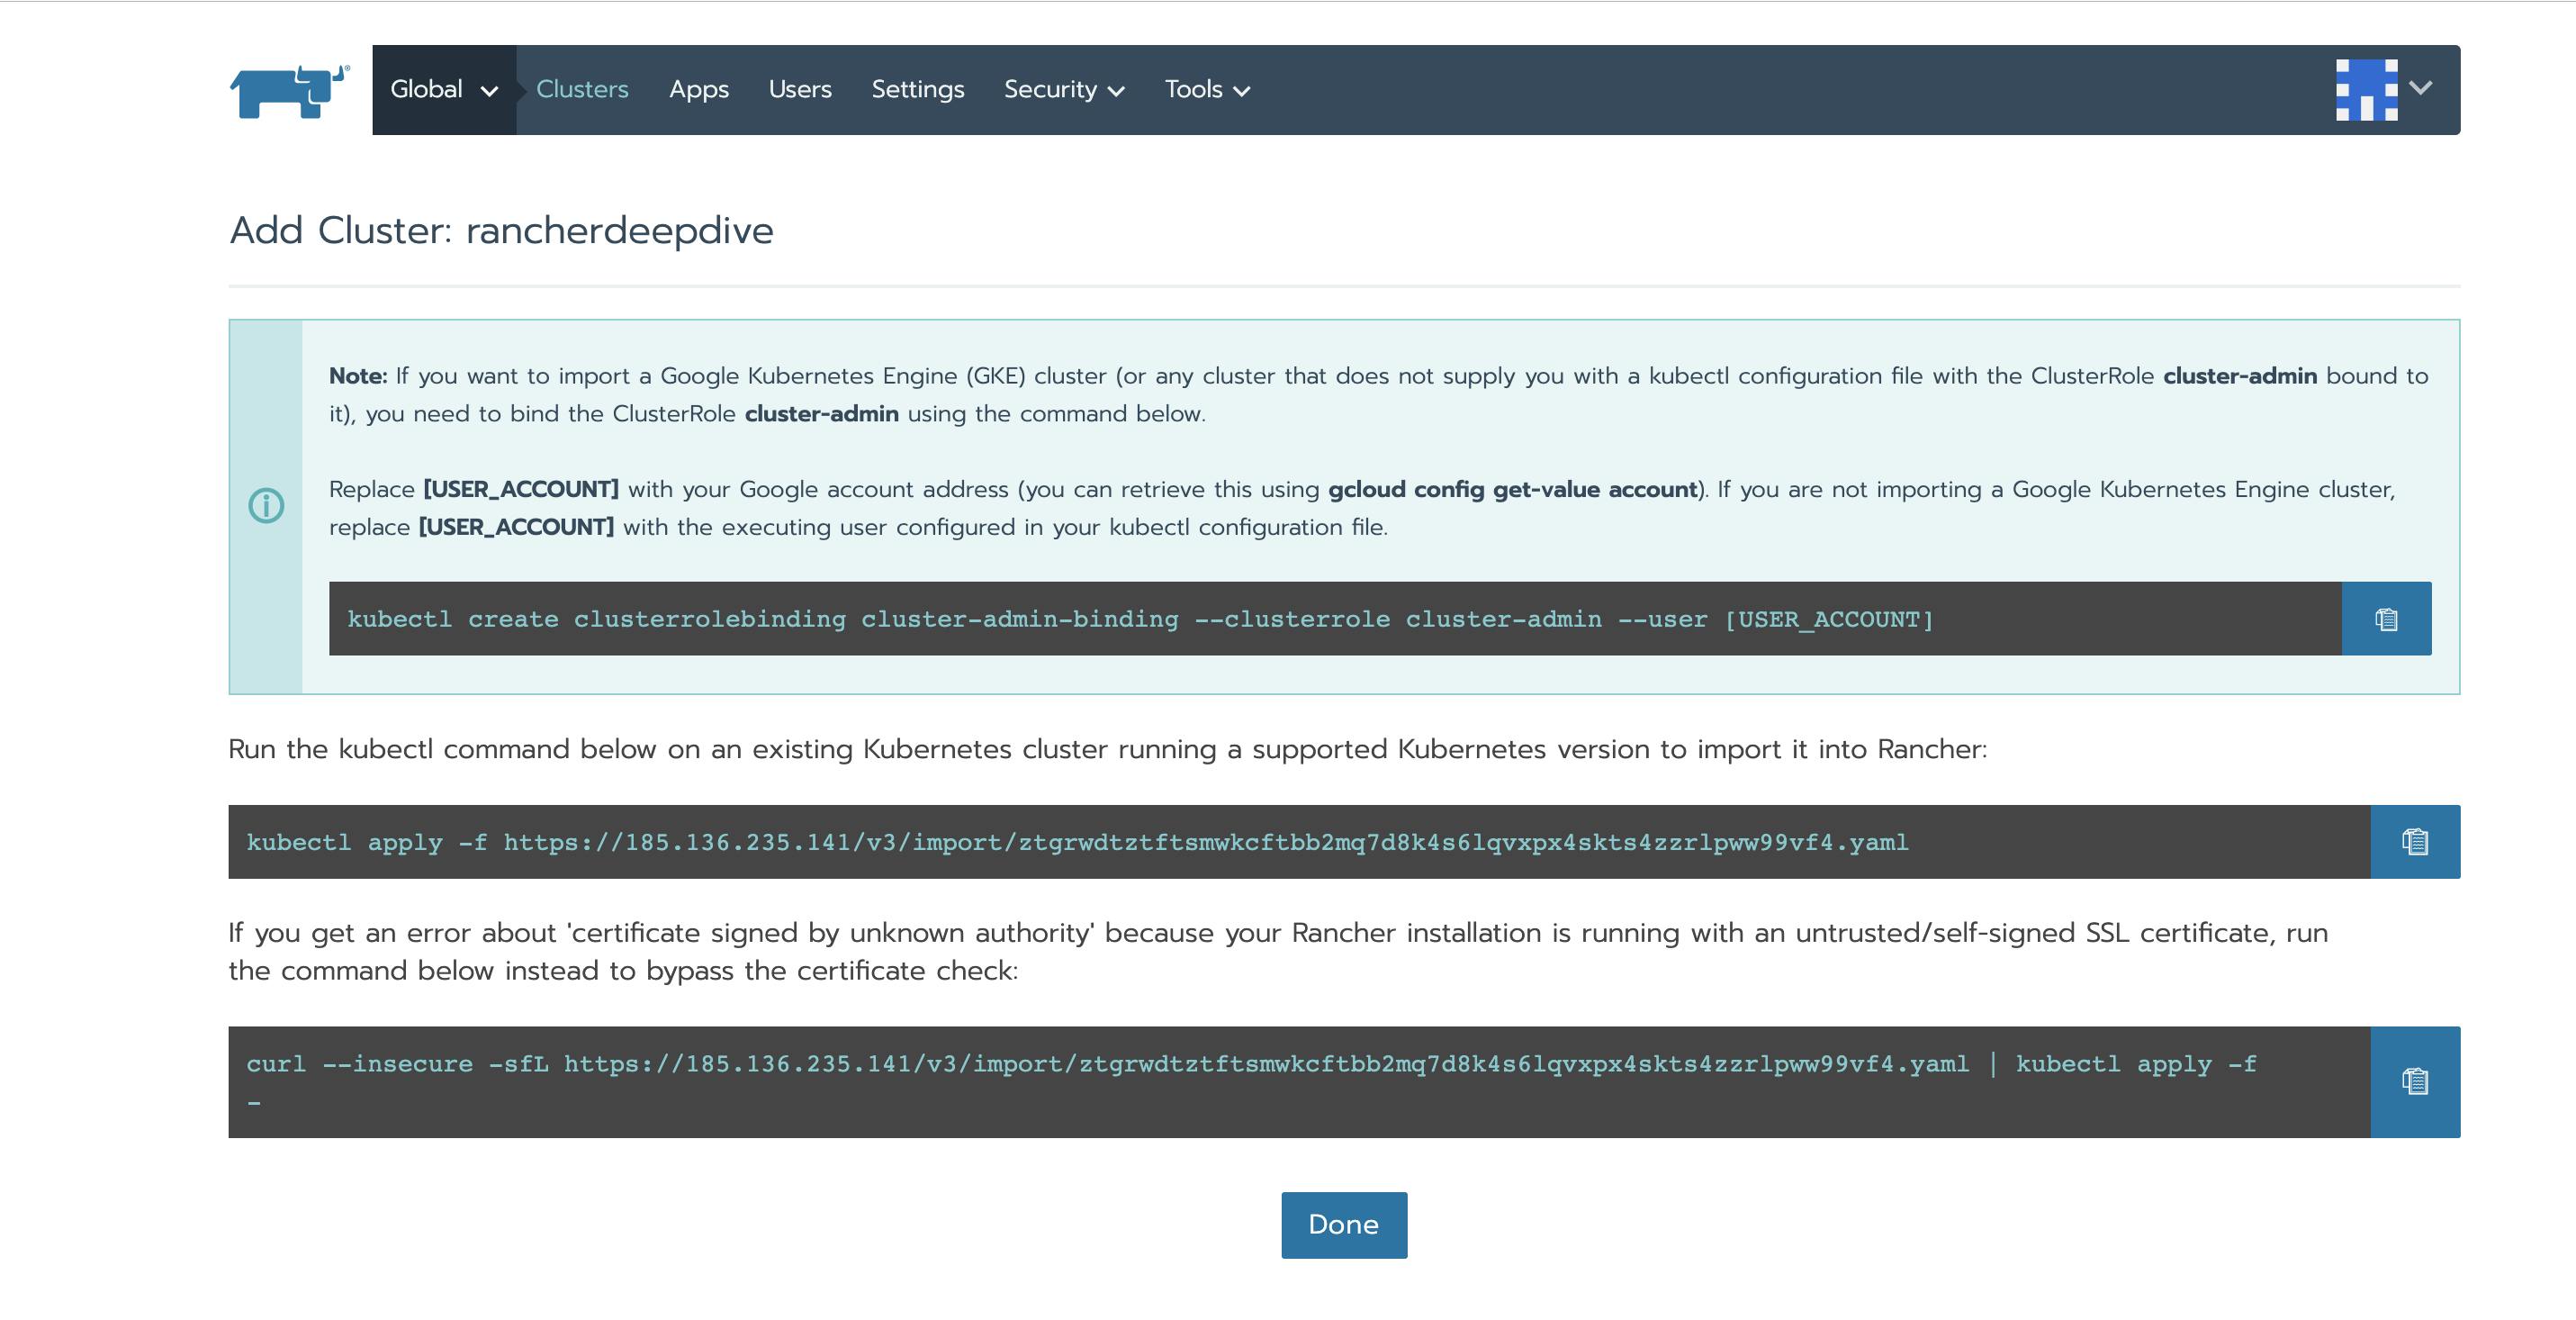
Step3: Copy the commands and run in kubernetes cluster and click done.
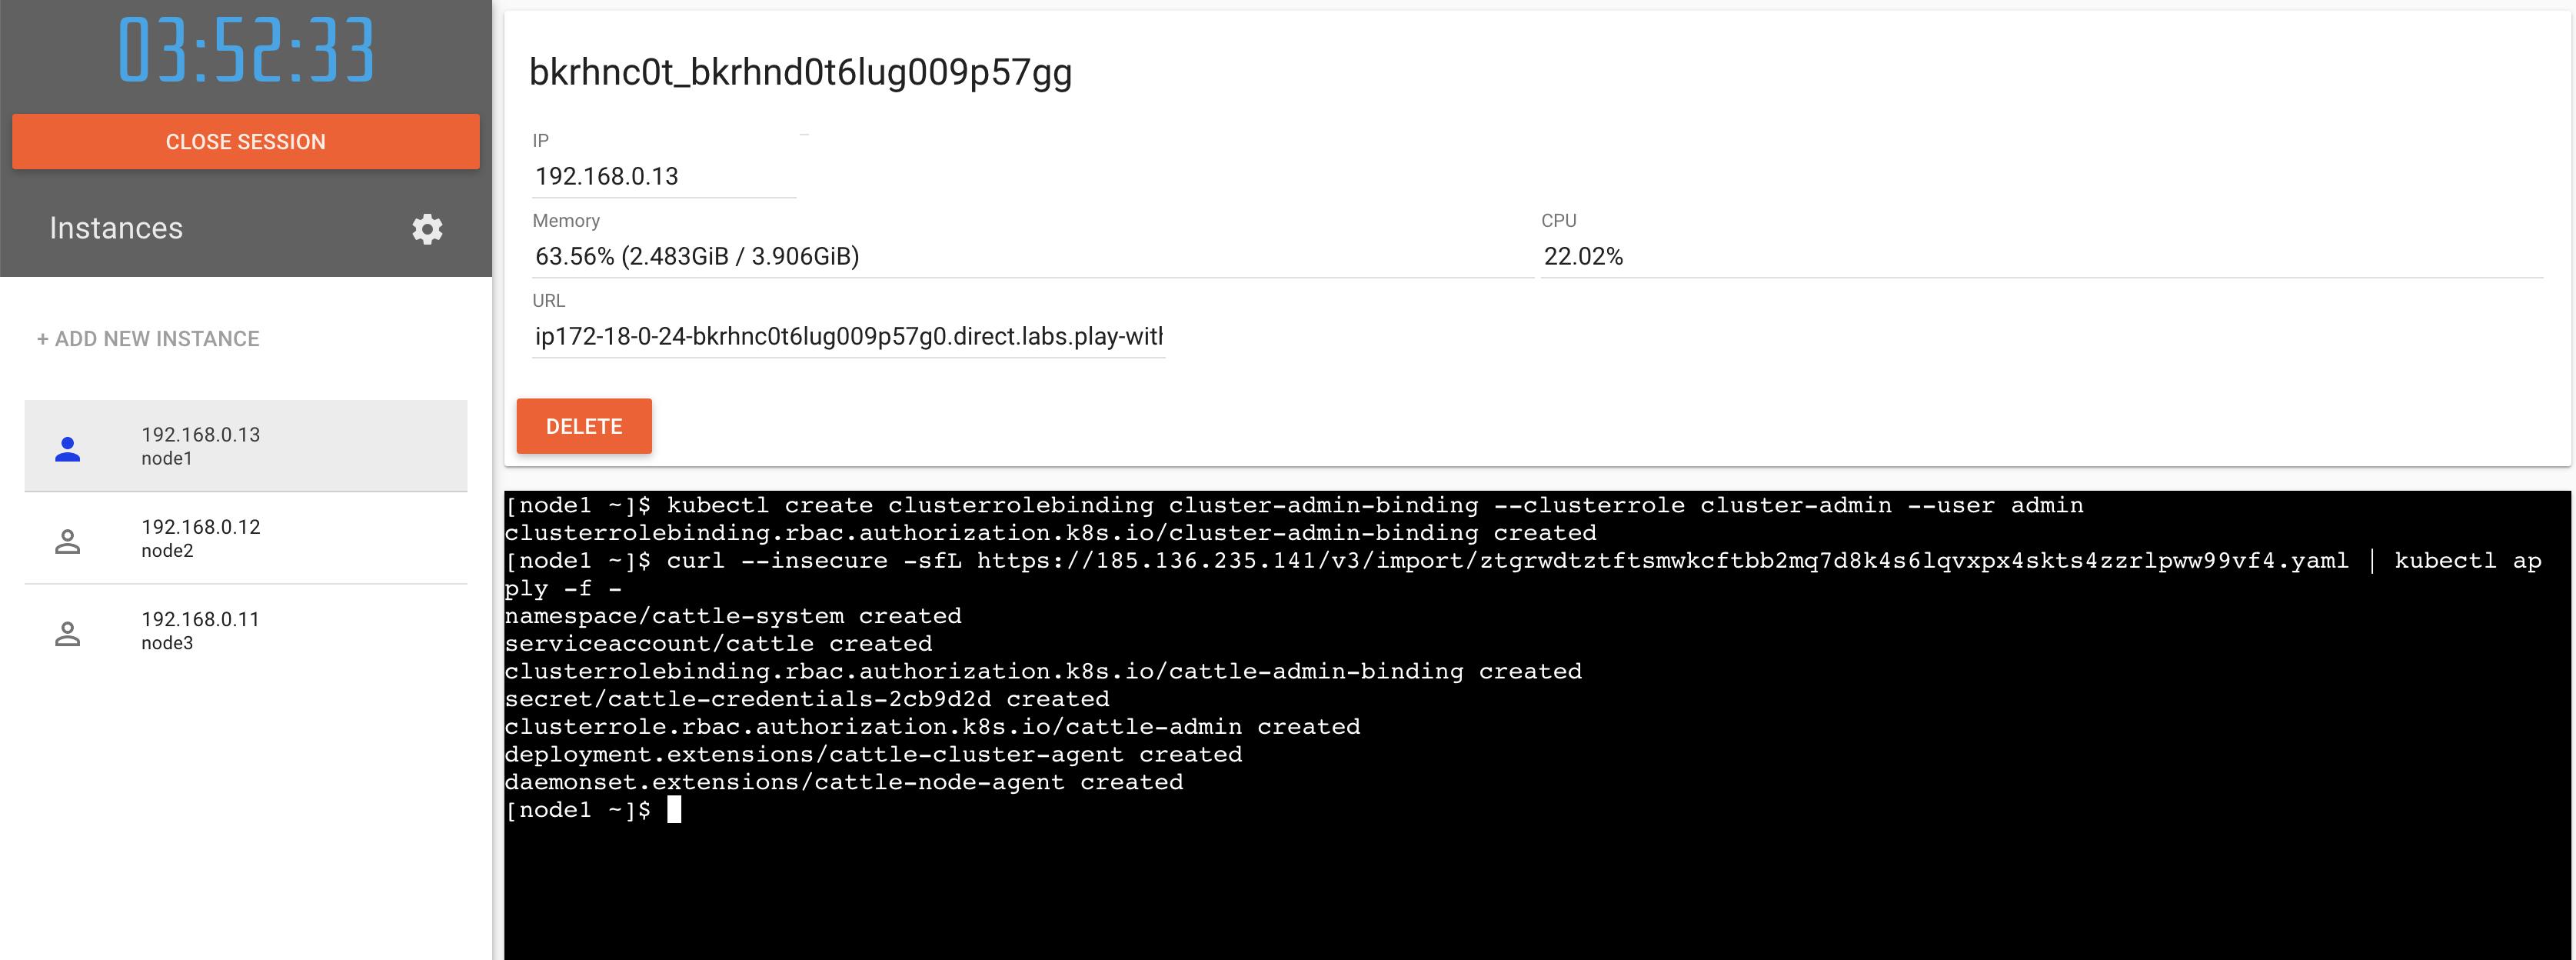 Deploying Rancher manifests
you will see a pending cluster in the rancher dashboard:

After some time the cluster is available and active.
 Active cluster
Now comes the real part where we actually go and see some of the cool features of rancher .
Monitoring :
Under the tools section for the cluster, you can select monitoring and then enable it. Note that you are required to give some parameters before enabling (give enough memory for monitoring as most of the times it fails when the cpu/memory parameters are not correct). I will keep it to default as it is a simple 3 node lightweight cluster …. well not as lightweight as the k3's.

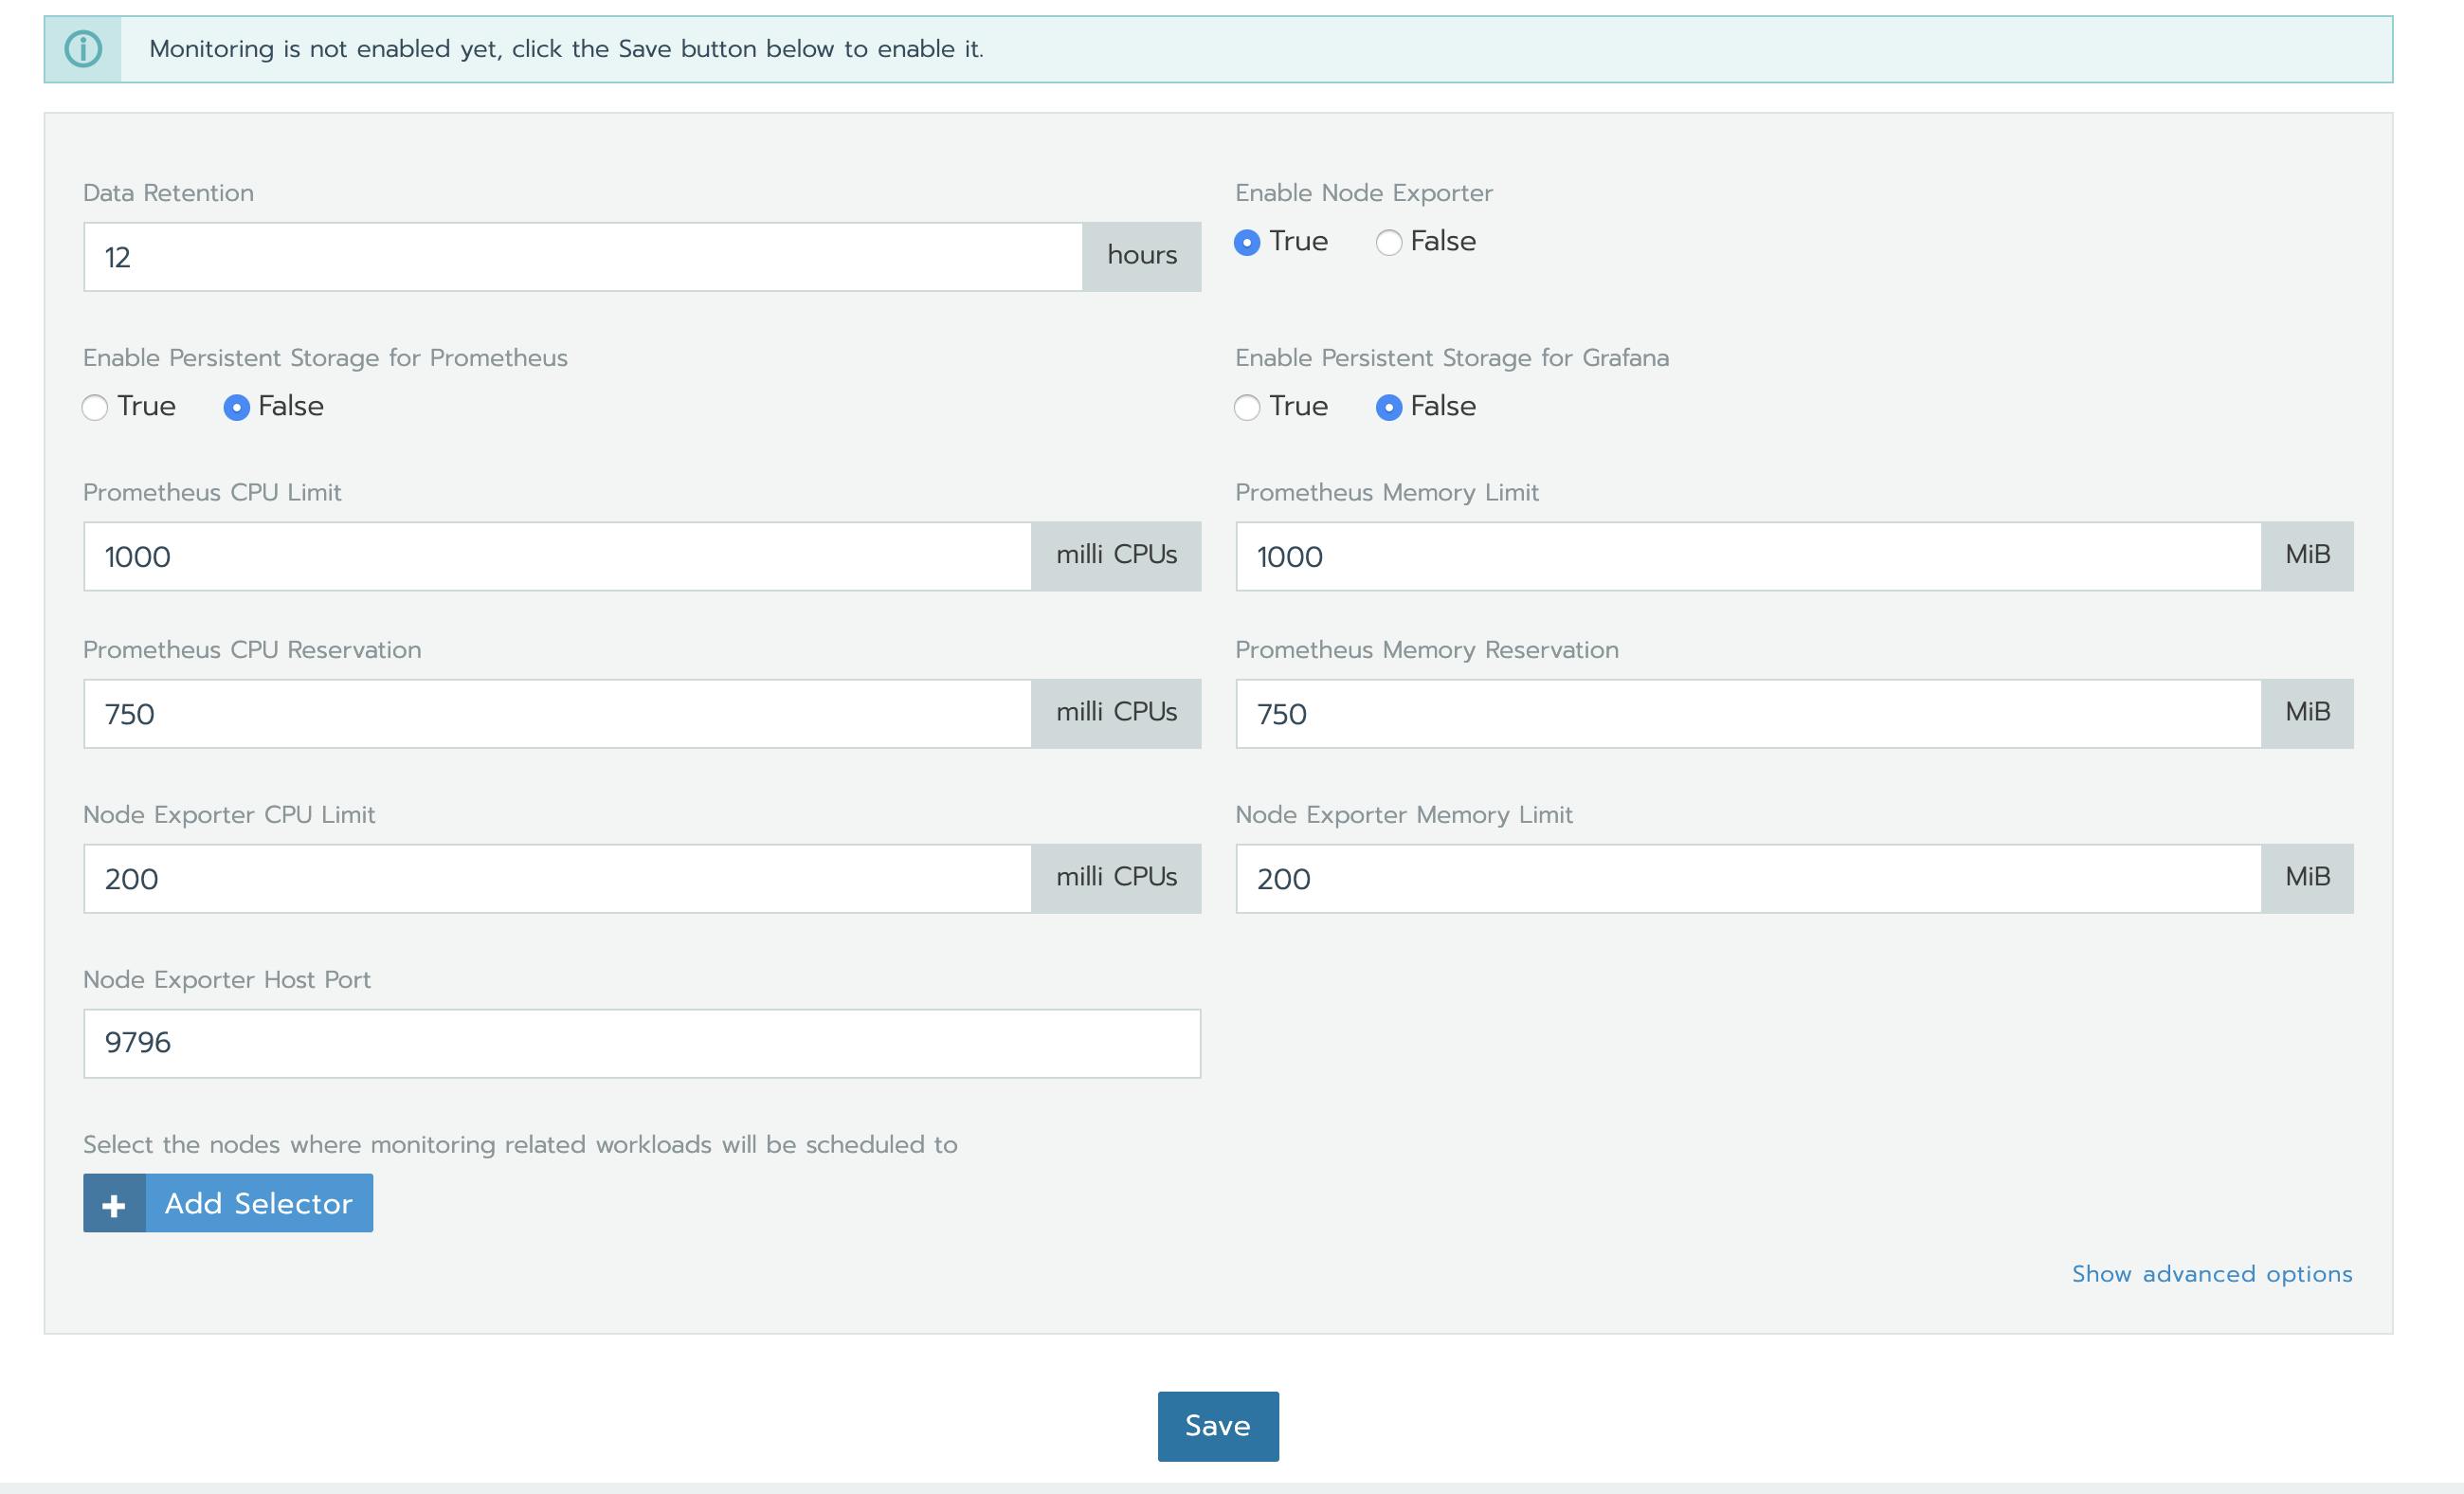
Once you click save and go back to the cluster you will see for some time the “monitoring api is not ready “.
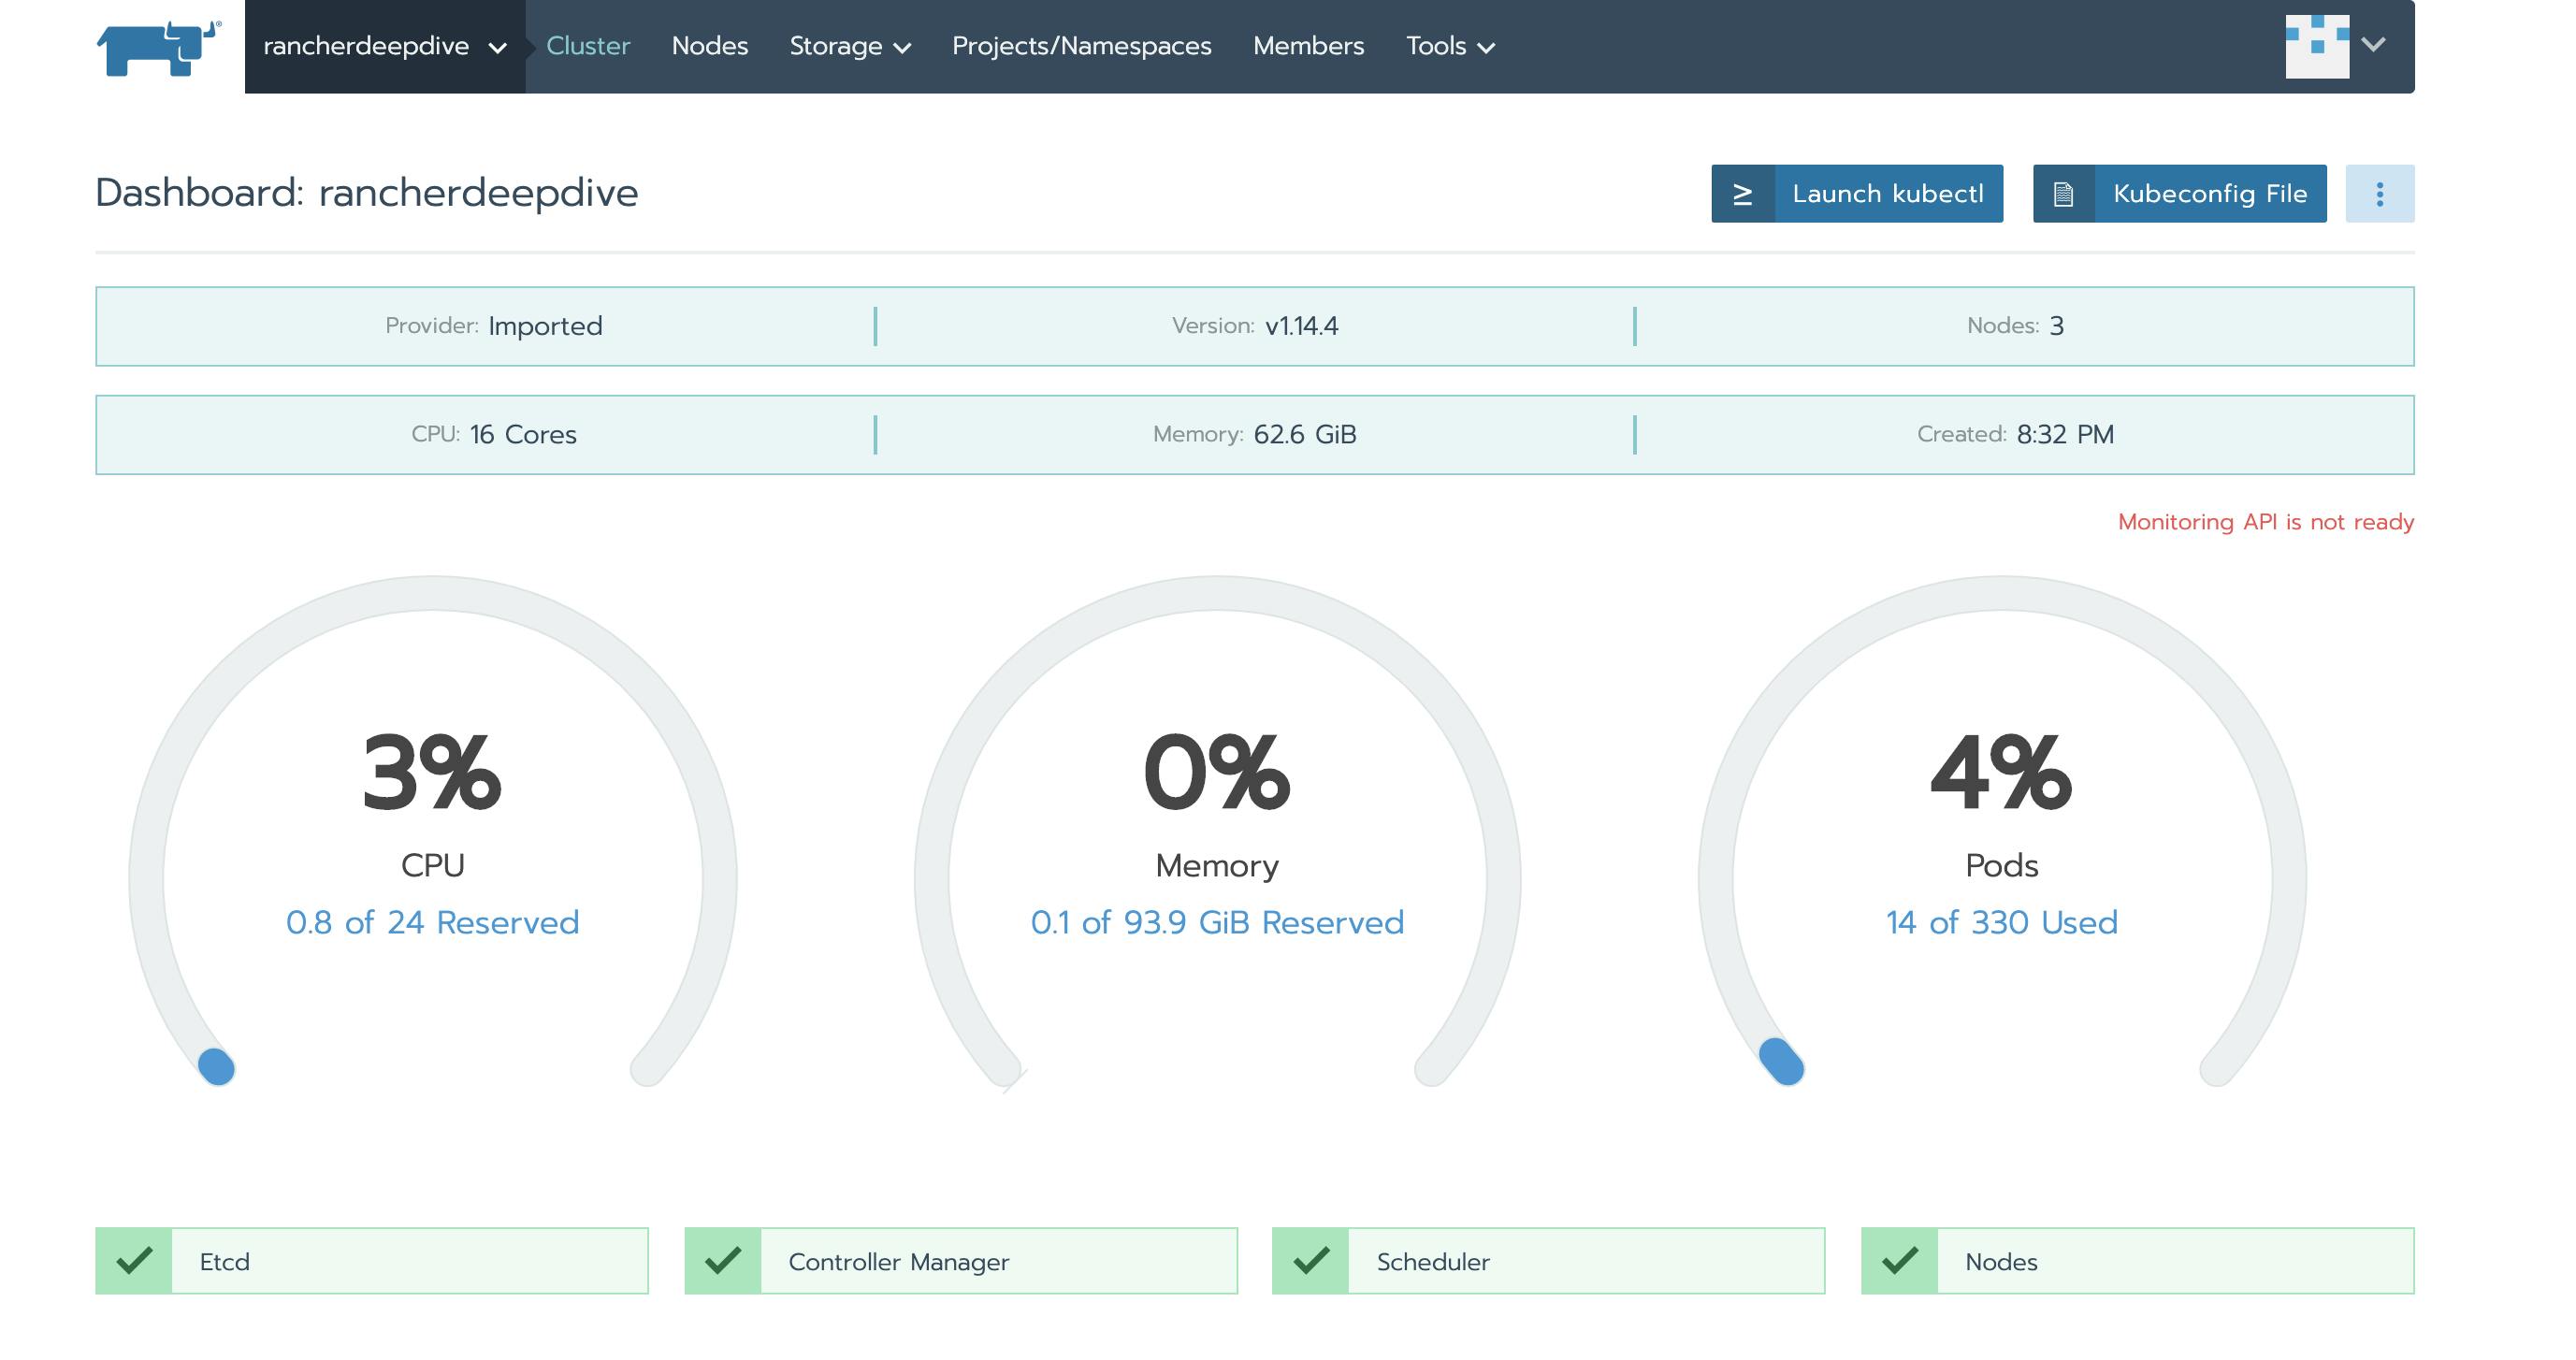 Monitoring api not ready
Actually what is happening is rancher is pulling the system-charts git repository in the rancher server and deploying it to the cluster. It can be visually seen in the UI under Cluster > System > Apps Section
 Apps
Apps
So Rancher Server tries to spin up pods and if you are using kubernetes playground you will see that it will run out of space and the Prometheus pod will never come up. So I have change minds here now I am using the Katakoda playground as it has more memory than the kubernetes playground. When you launch monitoring for the kubernetes cluster running in katakoda — 2 node cluster you can see within few minutes the monitoring api will be active and there will be a small grafana icon displayed with all the resources in the rancher UI
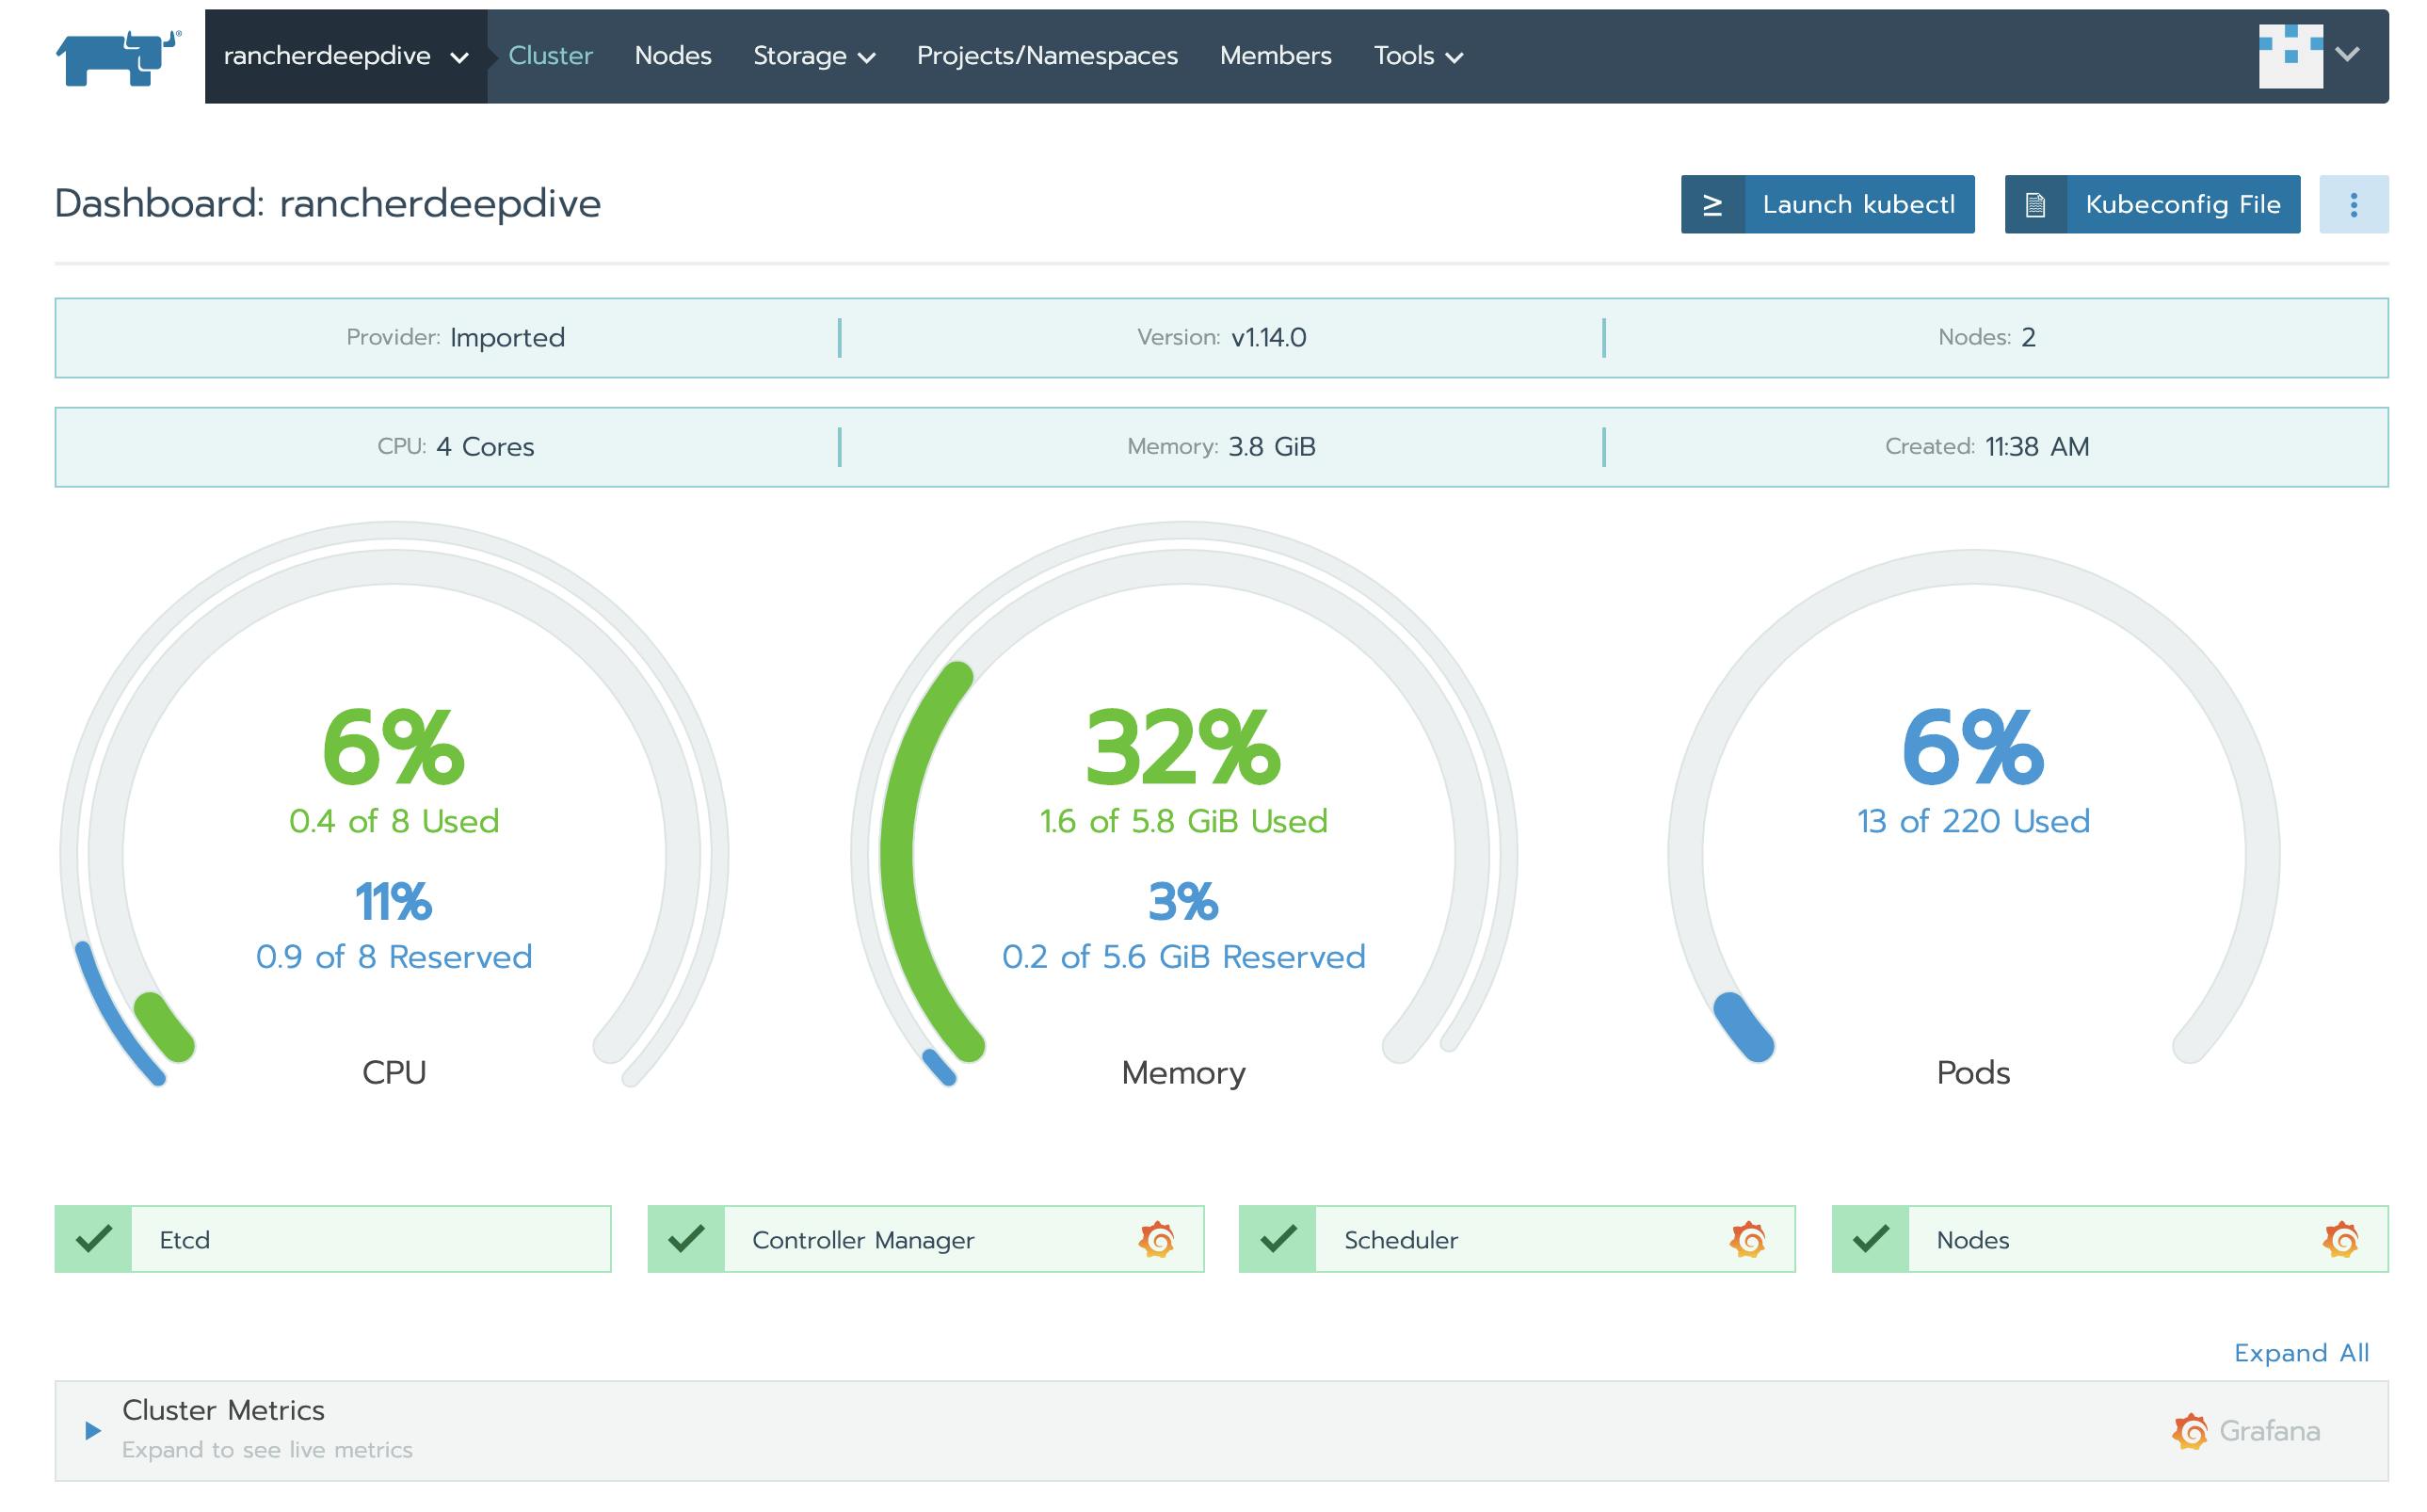 Monitoring API enabled
Now that the API is enabled let's look at some of the dashboards out of the box, easily accessible, easily readable and moreover you can add custom dashboards as well.
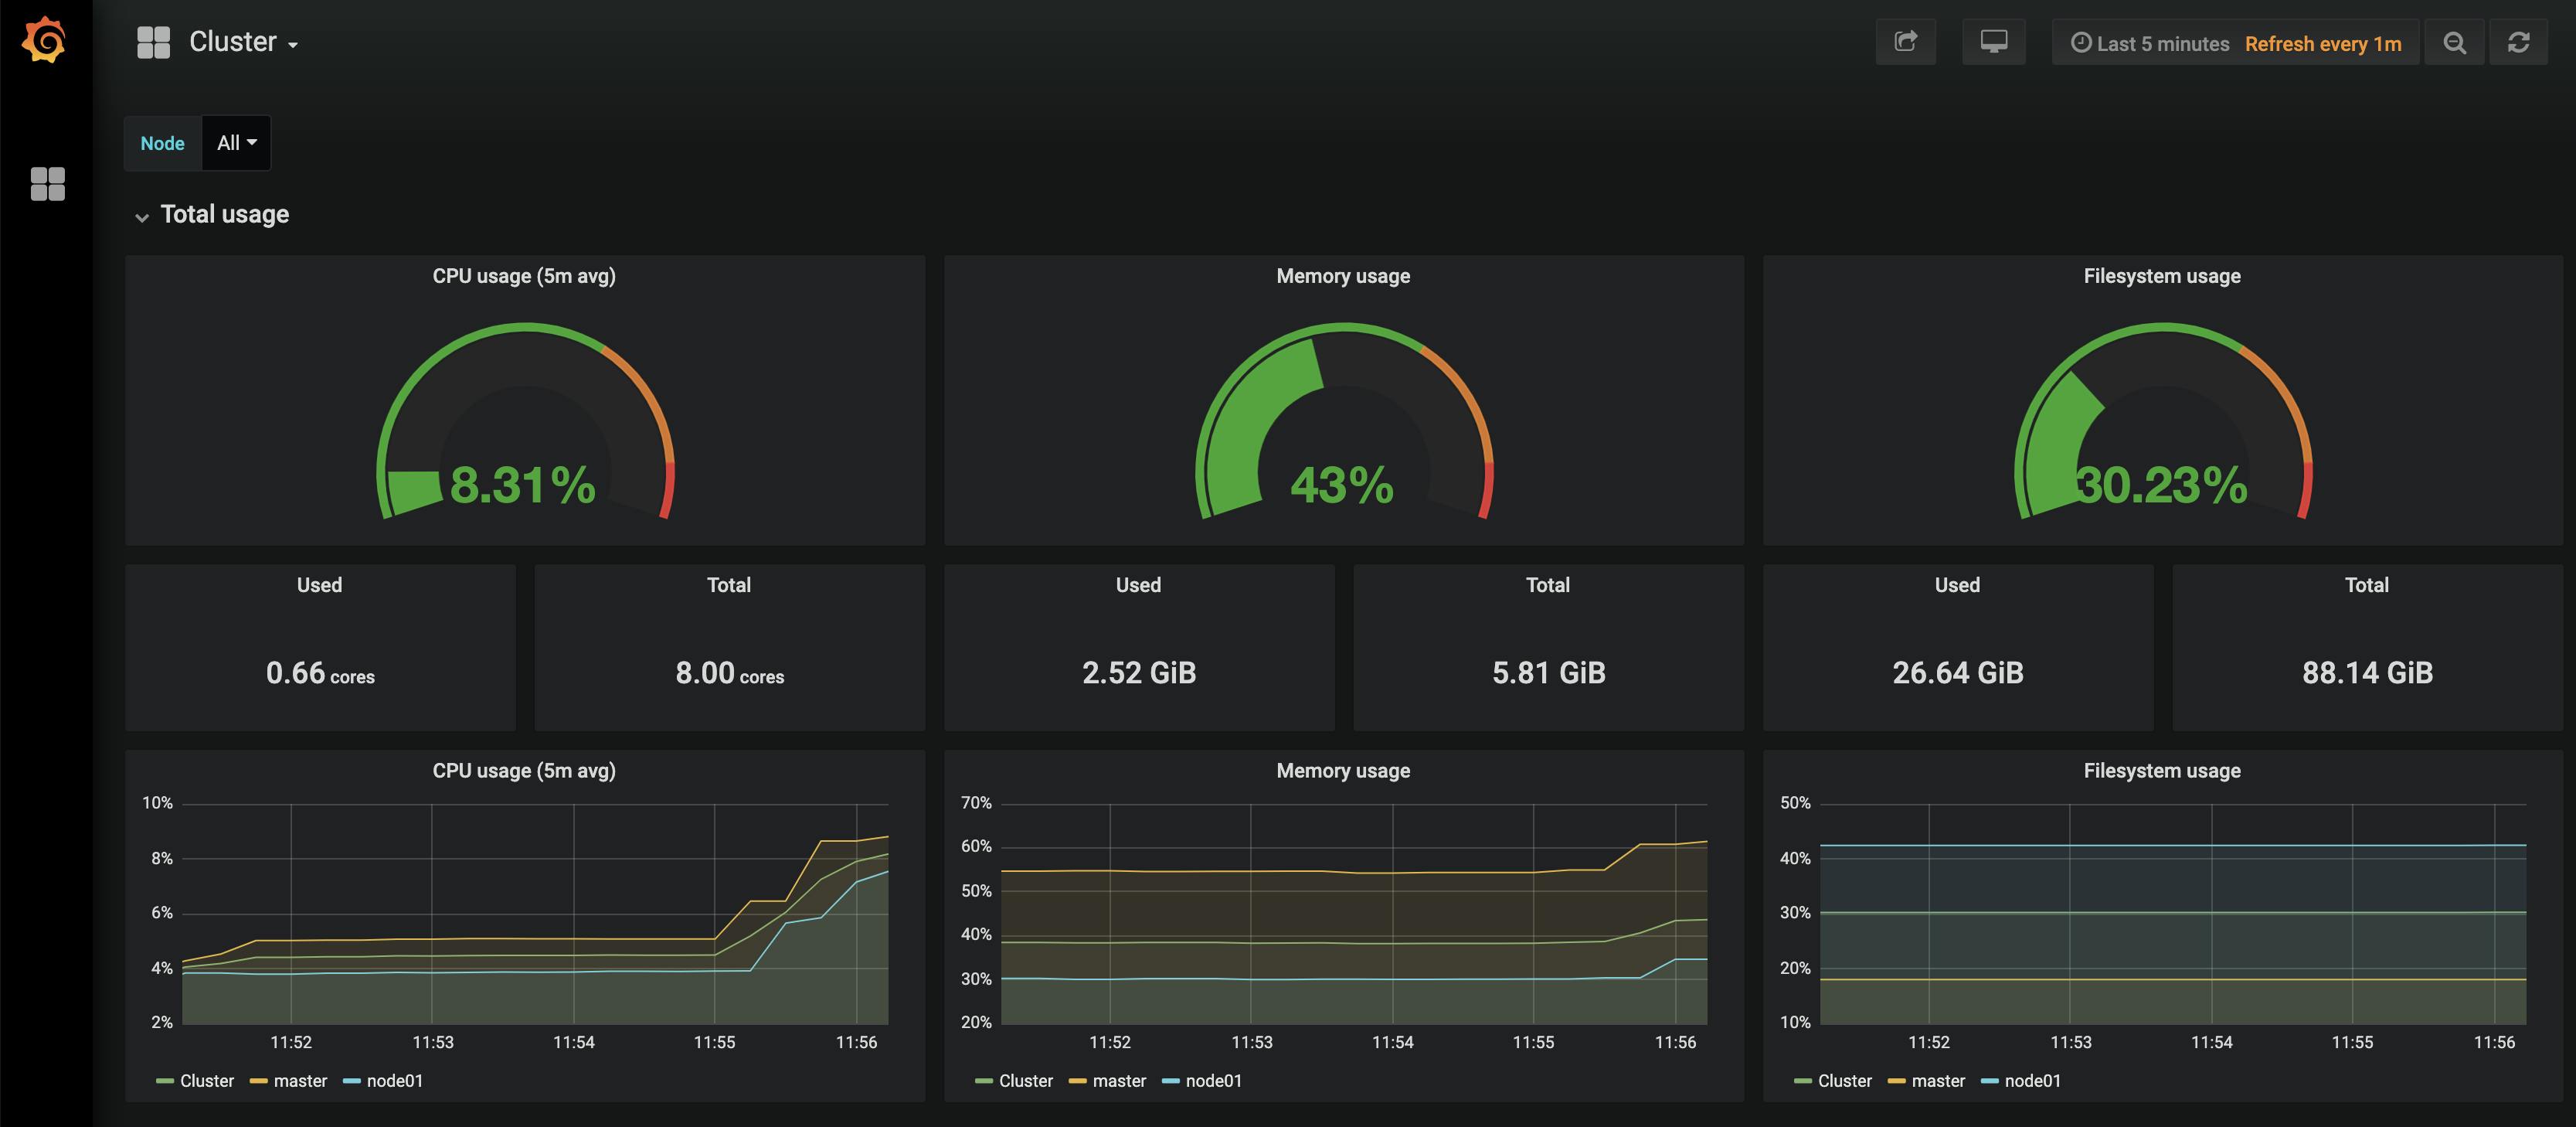 Cluster Metrics
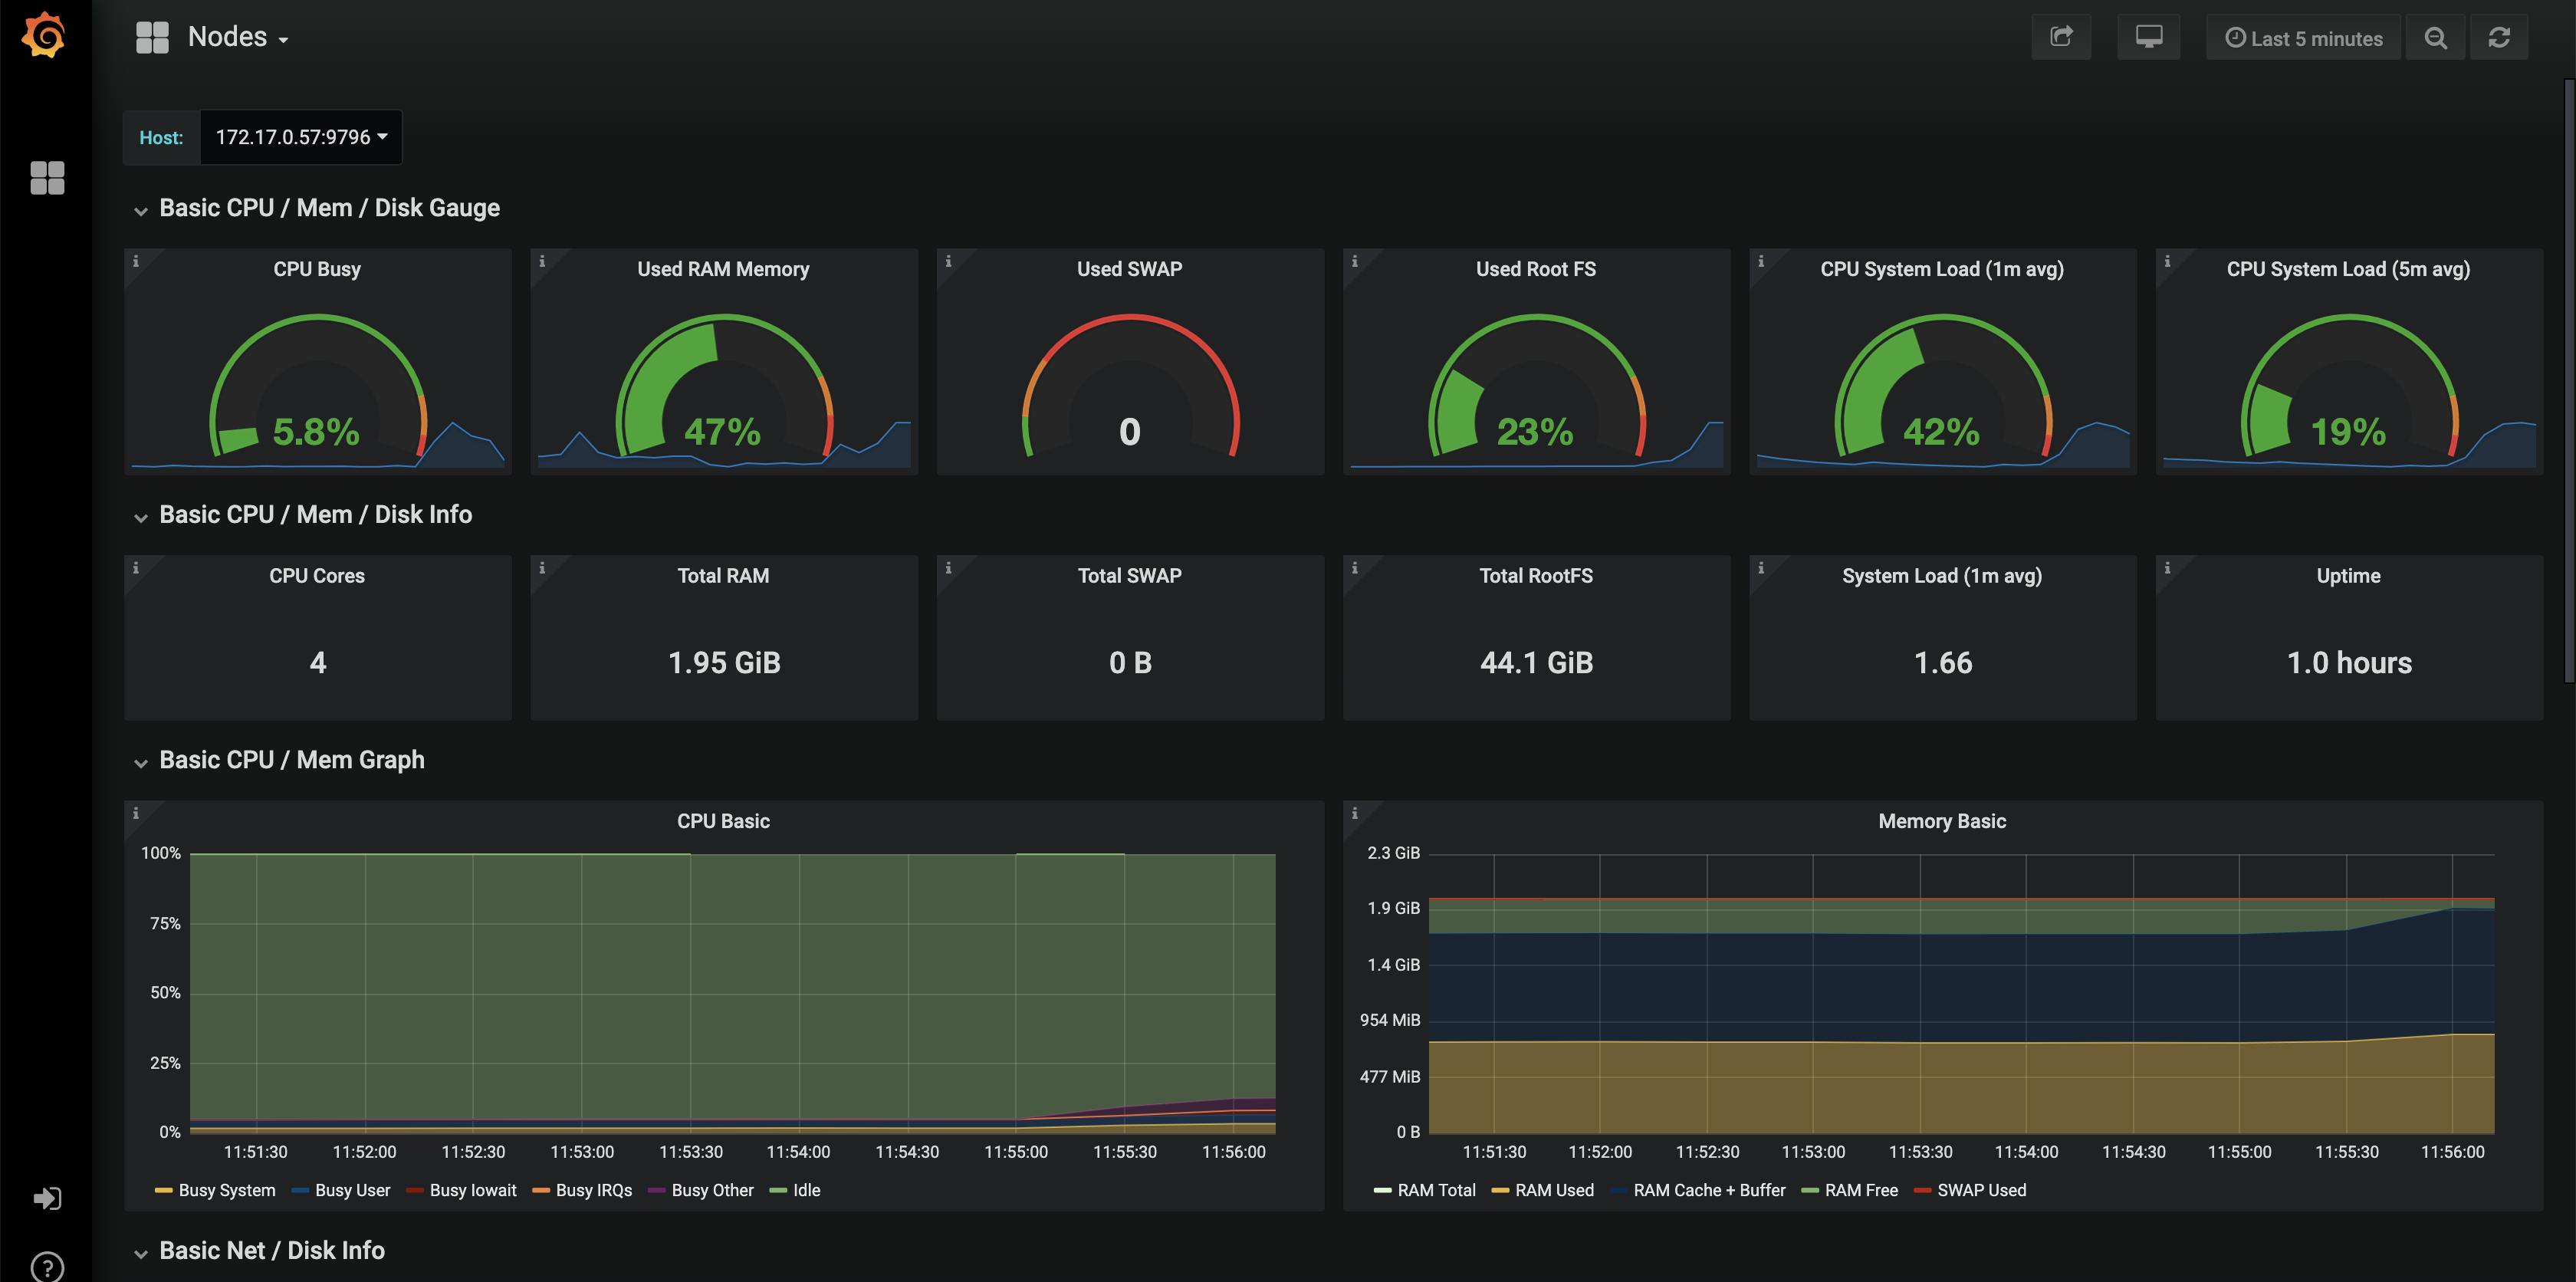 Node Metrics
Basic Troubleshooting for Monitoring API not coming up or not getting in the ready state:
First, go to the cluster > system >> apps > click on the apps
You would see Cluster-monitoring and monitoring-operator being installed which is nothing but creating pods inside the cluster.
Click on one of the apps if you see the red and see the issue. Few of the common issues include : 1) Space issue or resources issue for this, have a look at cluster resources. 2) not able to pull system-charts repo from GitHub (this can be due to a private network or no internet access for the rancher server ). Resolution for this is to go inside the rancher server container and manually try to do a git pull. If in private network clone the repo to your laptop > push everything in your enterprise GitHub or any accessible Git repo > change the repo in /v3/catalogs /system-library.
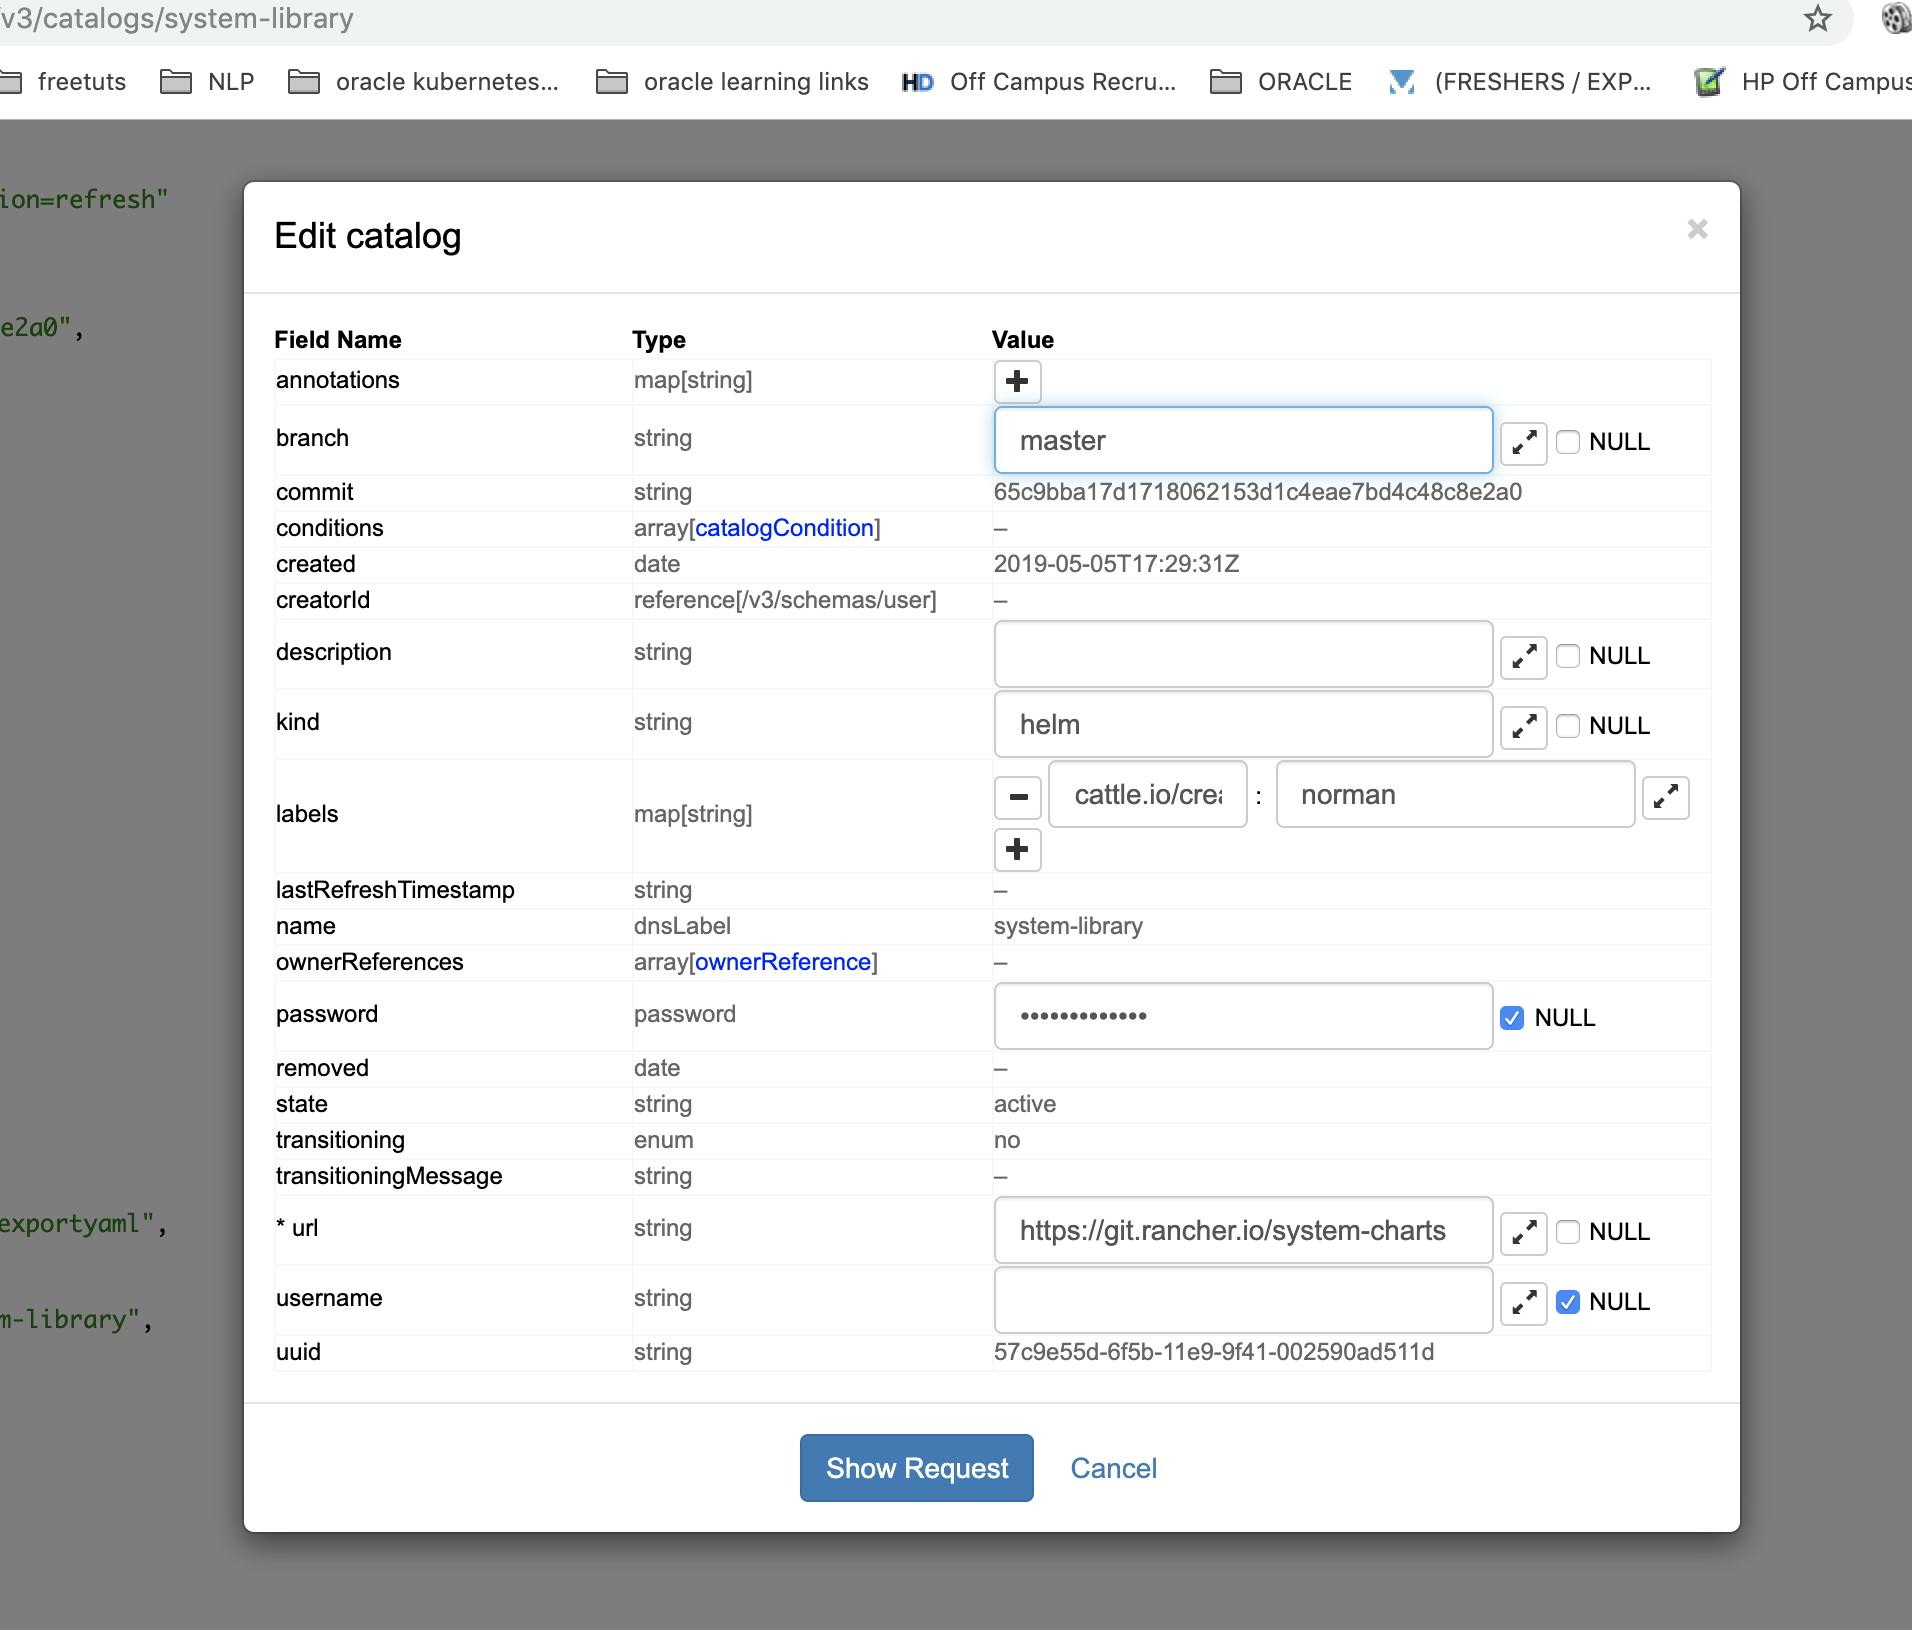
- Not able to download the images from docker hub. For this, you need to update the registry and put your private registry where the images are present or the registry you have access over the network. You can change this in the global >> settings

- Other issues can be checked by seeing what error is displayed in the apps/workloads under the System for that cluster.
Rancher Security :
Let move over to Rancher security which includes > Roles, Pod Security Policies and Authentication. There are different authentication support provided by rancher and the roles are basically RBAC powered. Whenever you create a user with a role it is actually getting created inside the cluster with RBAC.
Roles: Roles are Global, CLuster level and Project Level. Except for the global roles you can create the other two from the UI. Cluster Role is really helpful in proving specific permissions for specific resources. Let's create a custom role for view-only permission to the cluster.
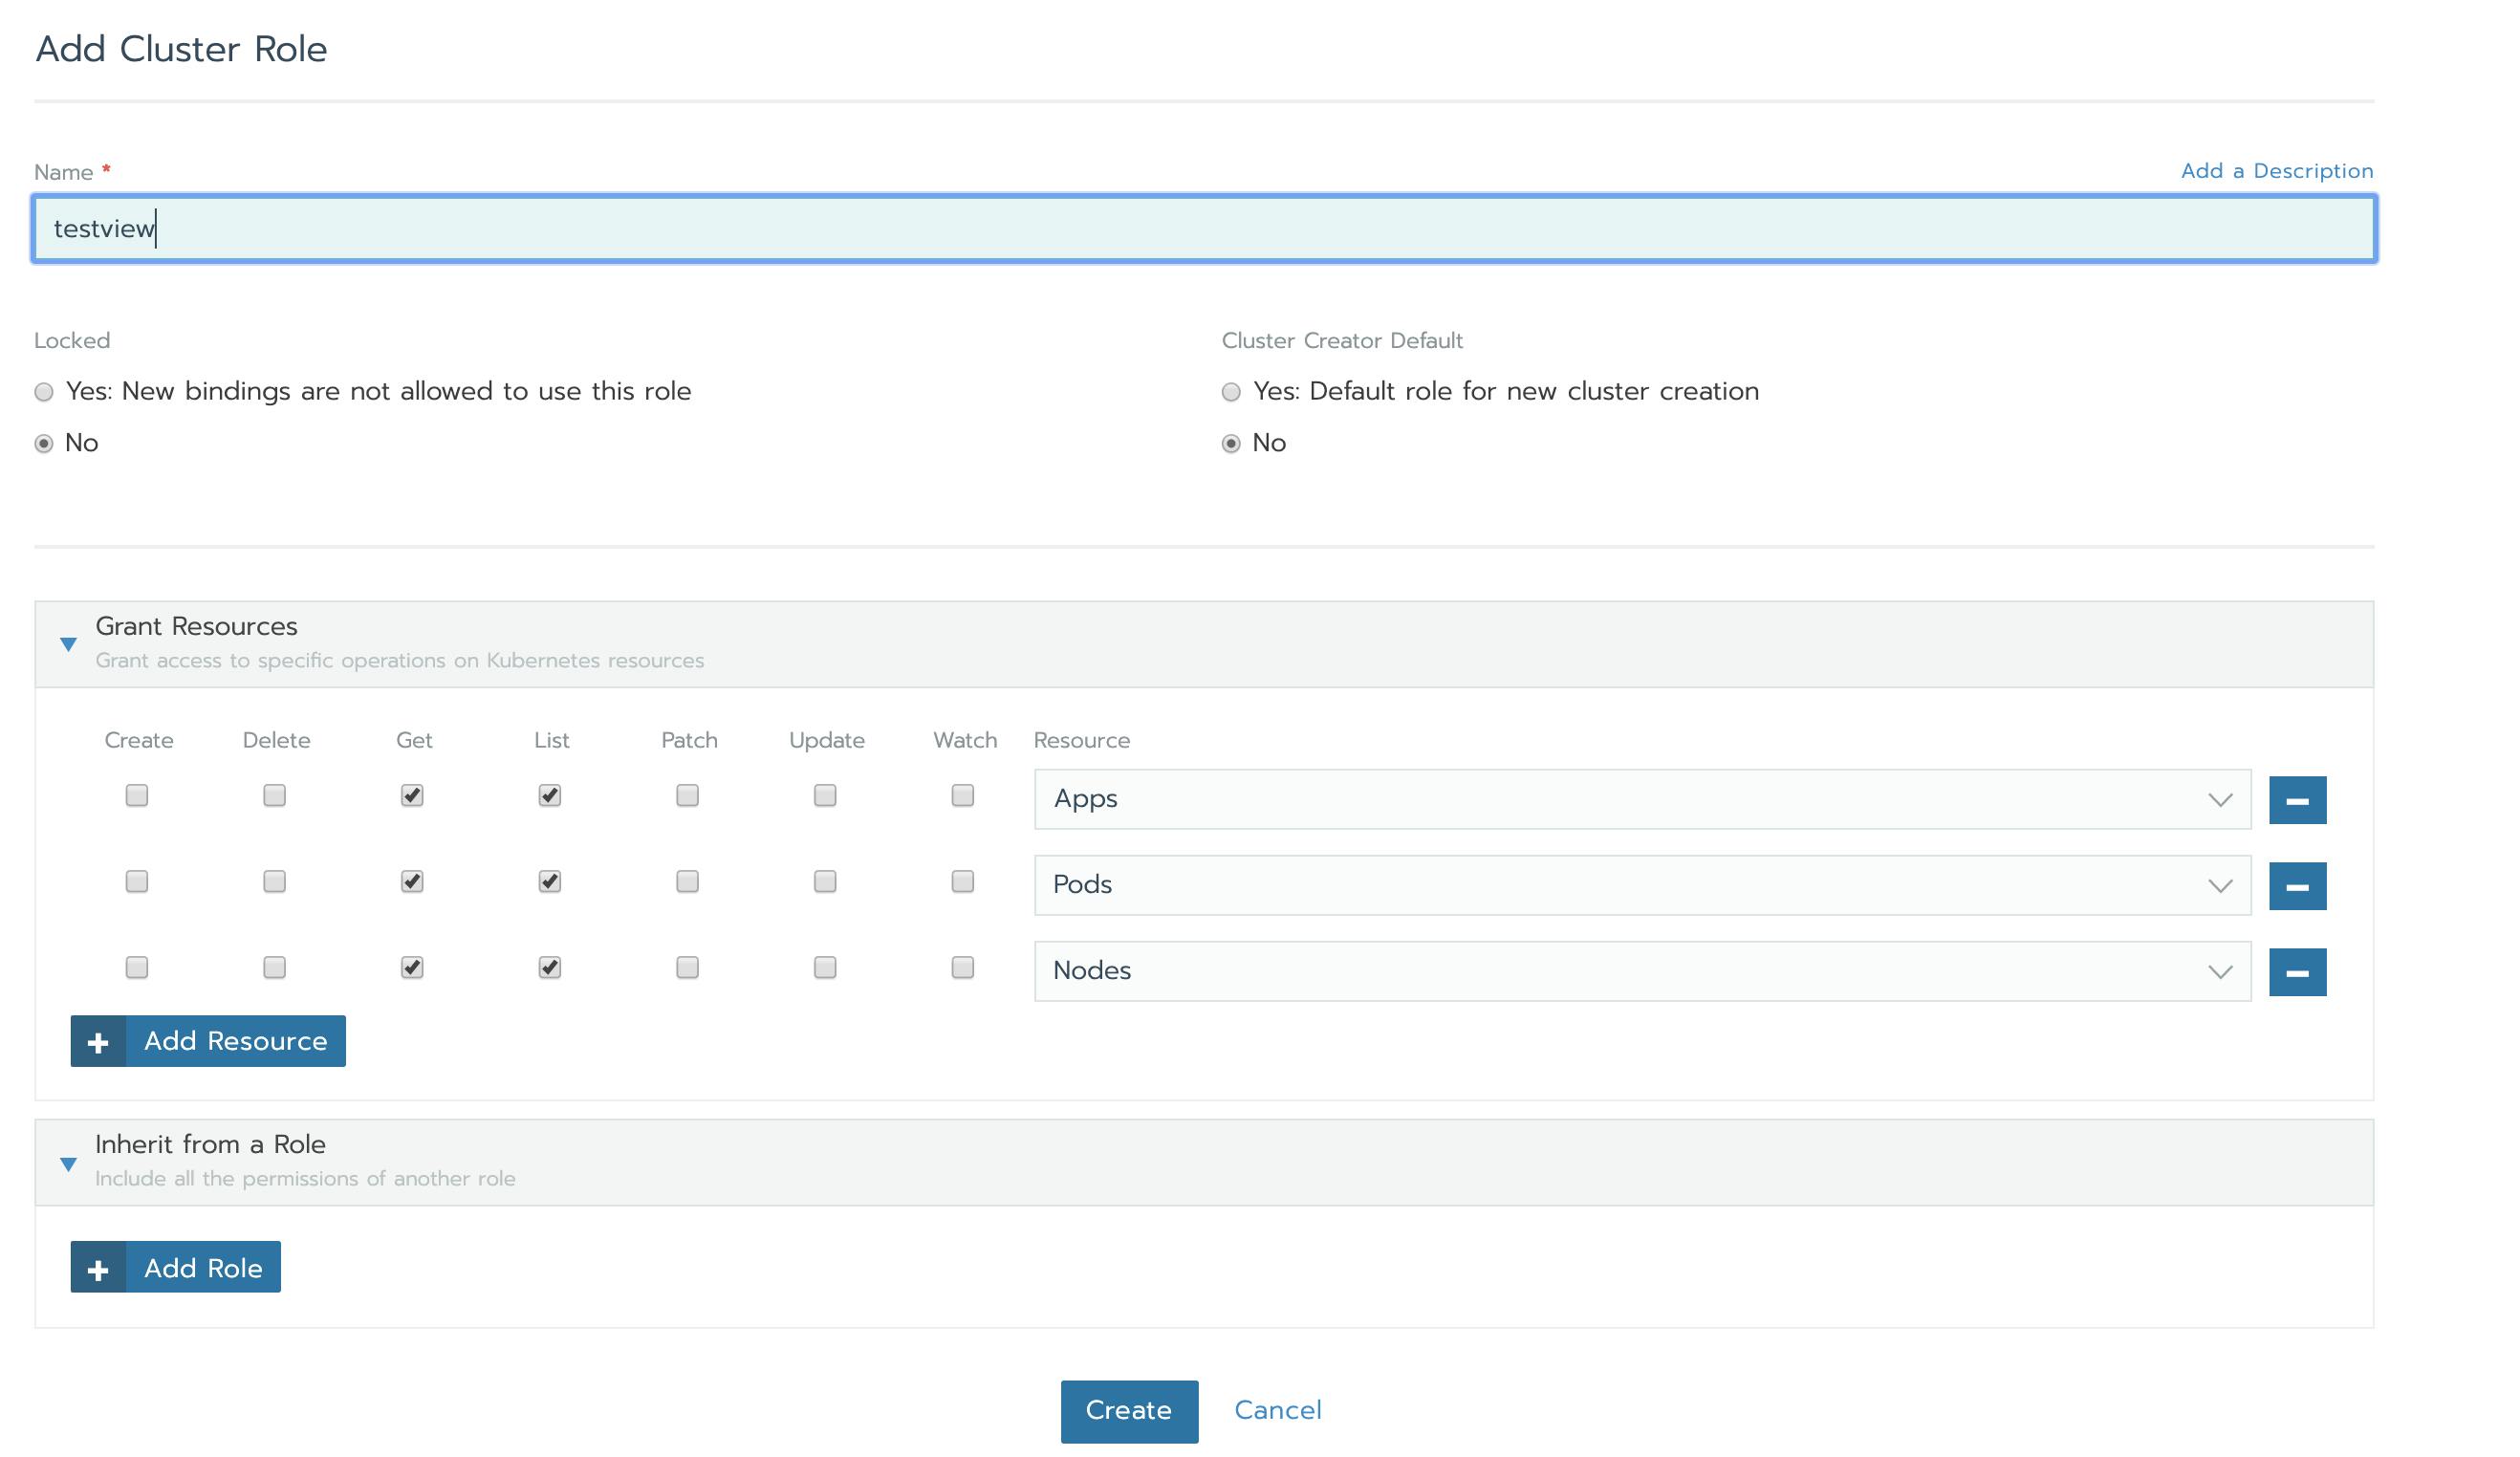 Cluster role creation
Now let us Create a standard USER and add this user to our created cluster.
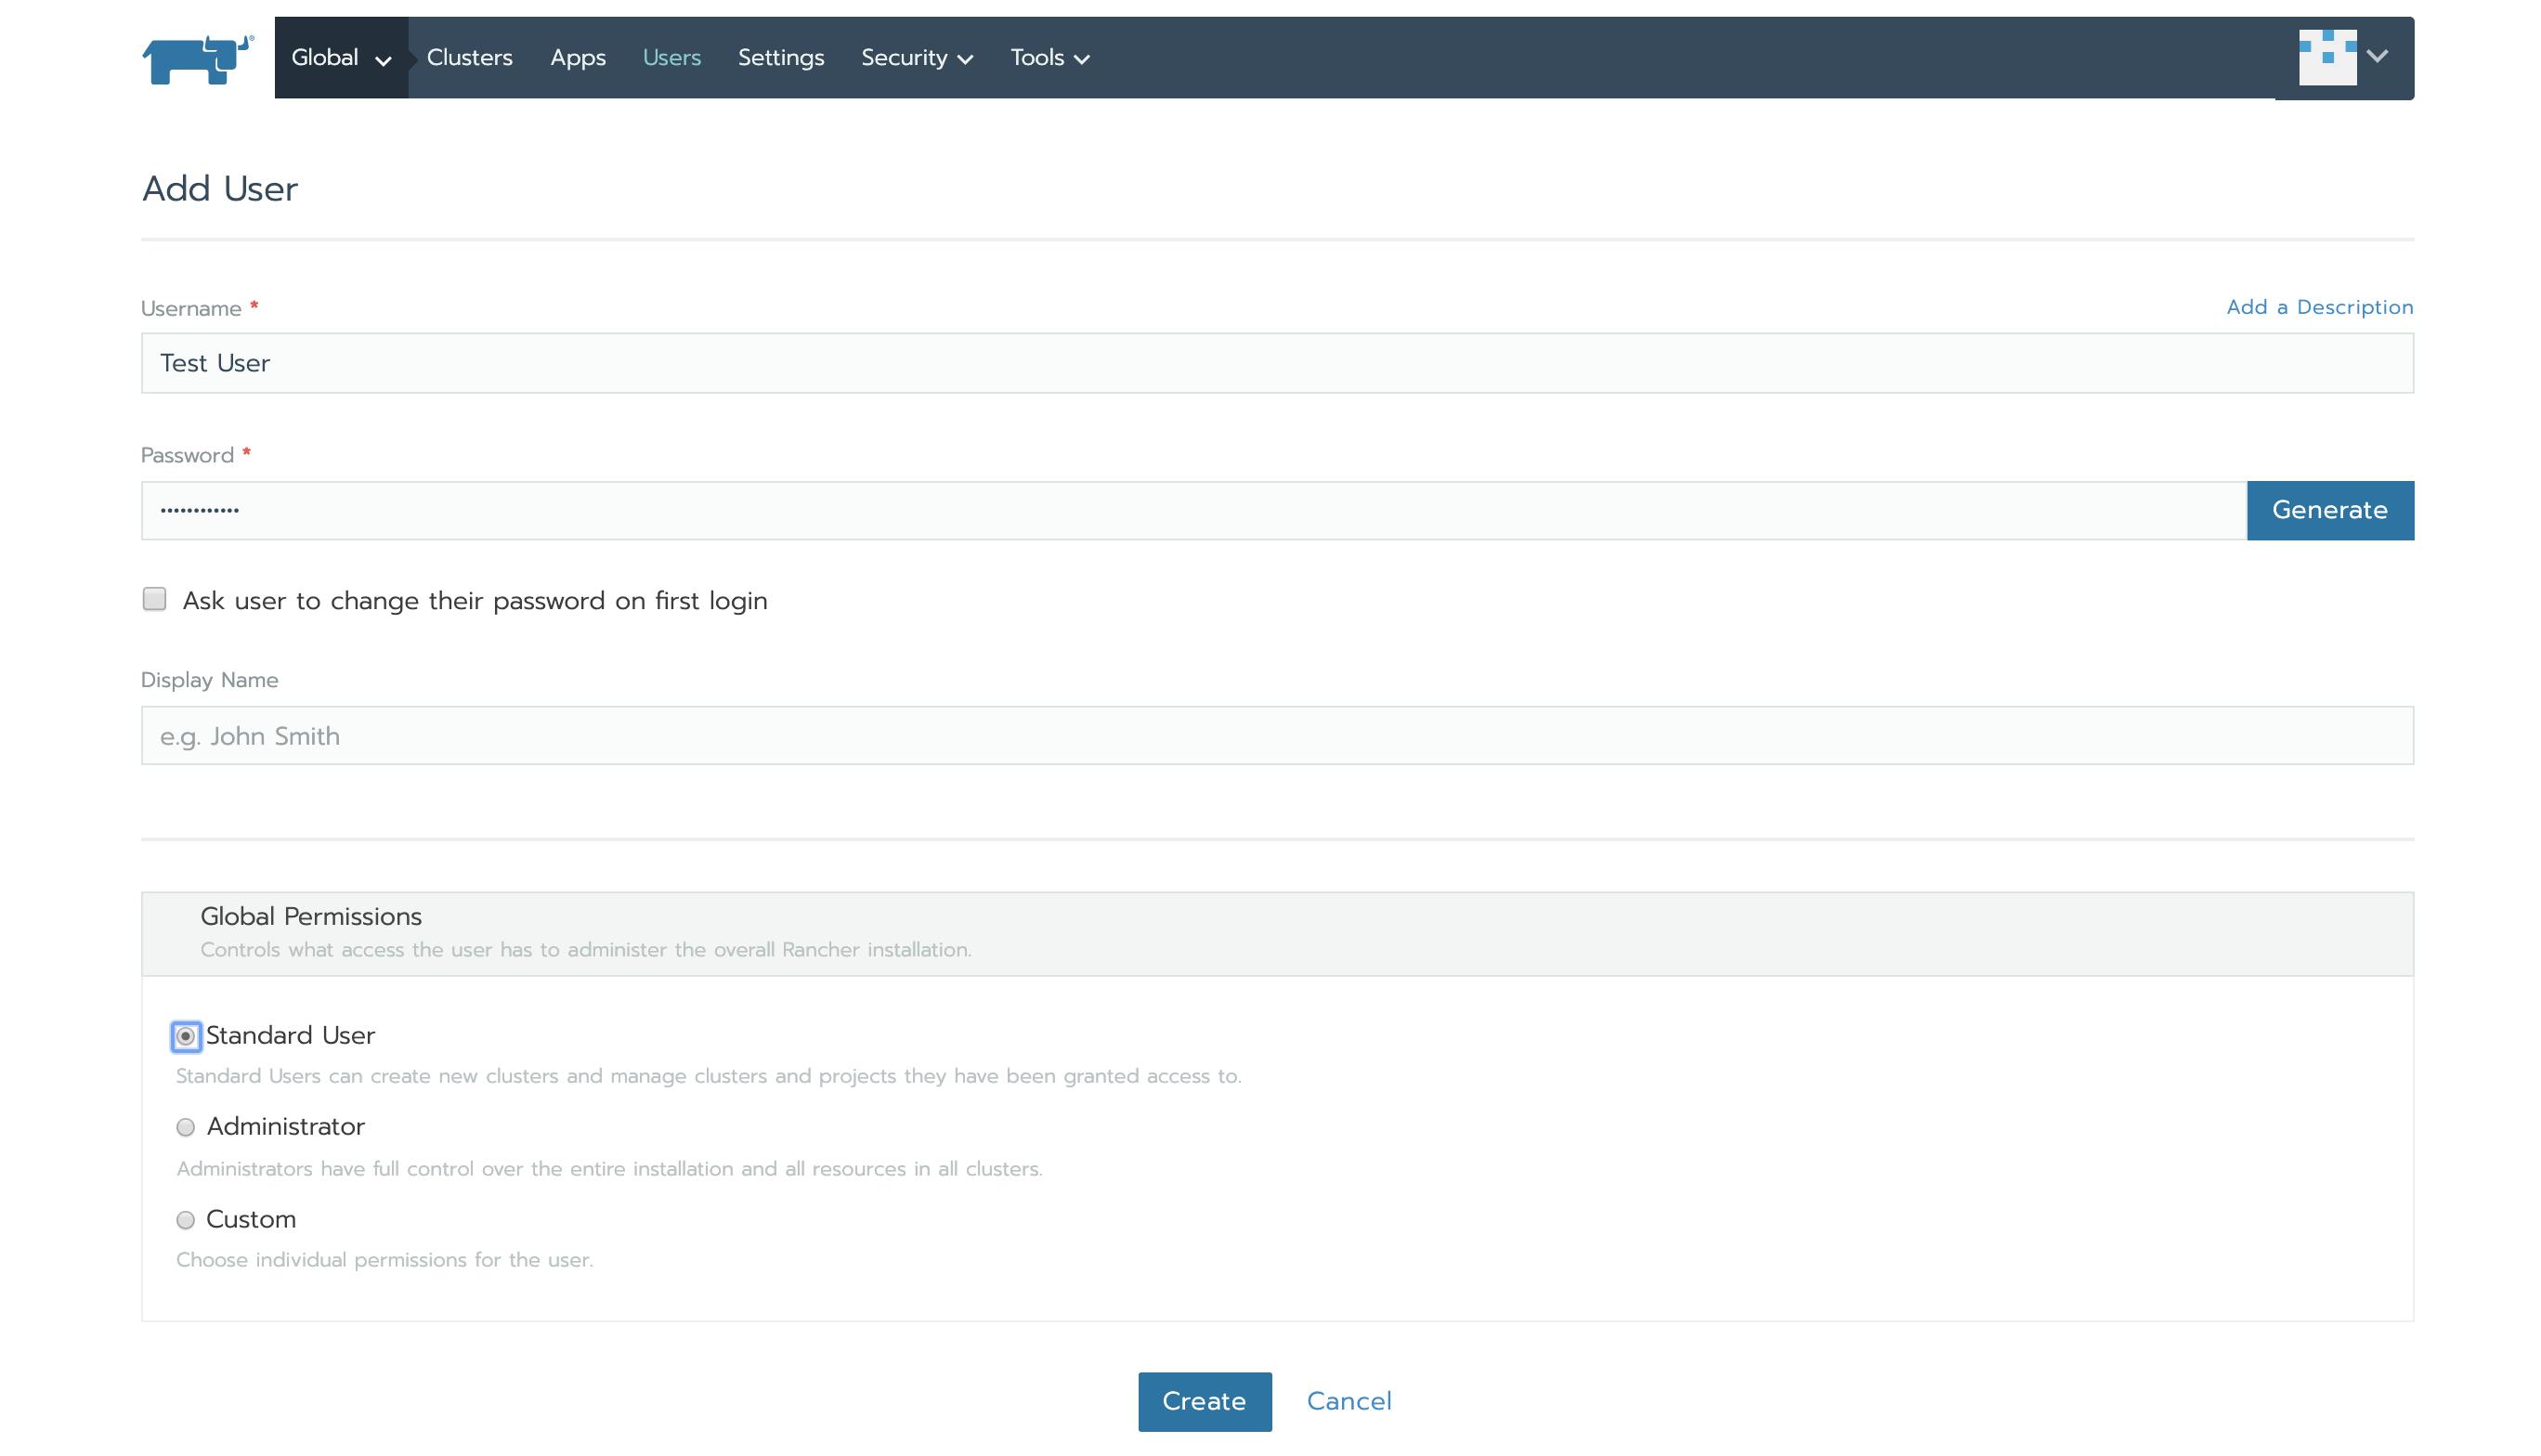 user creation
Add the member to the cluster by selecting the custom role created.
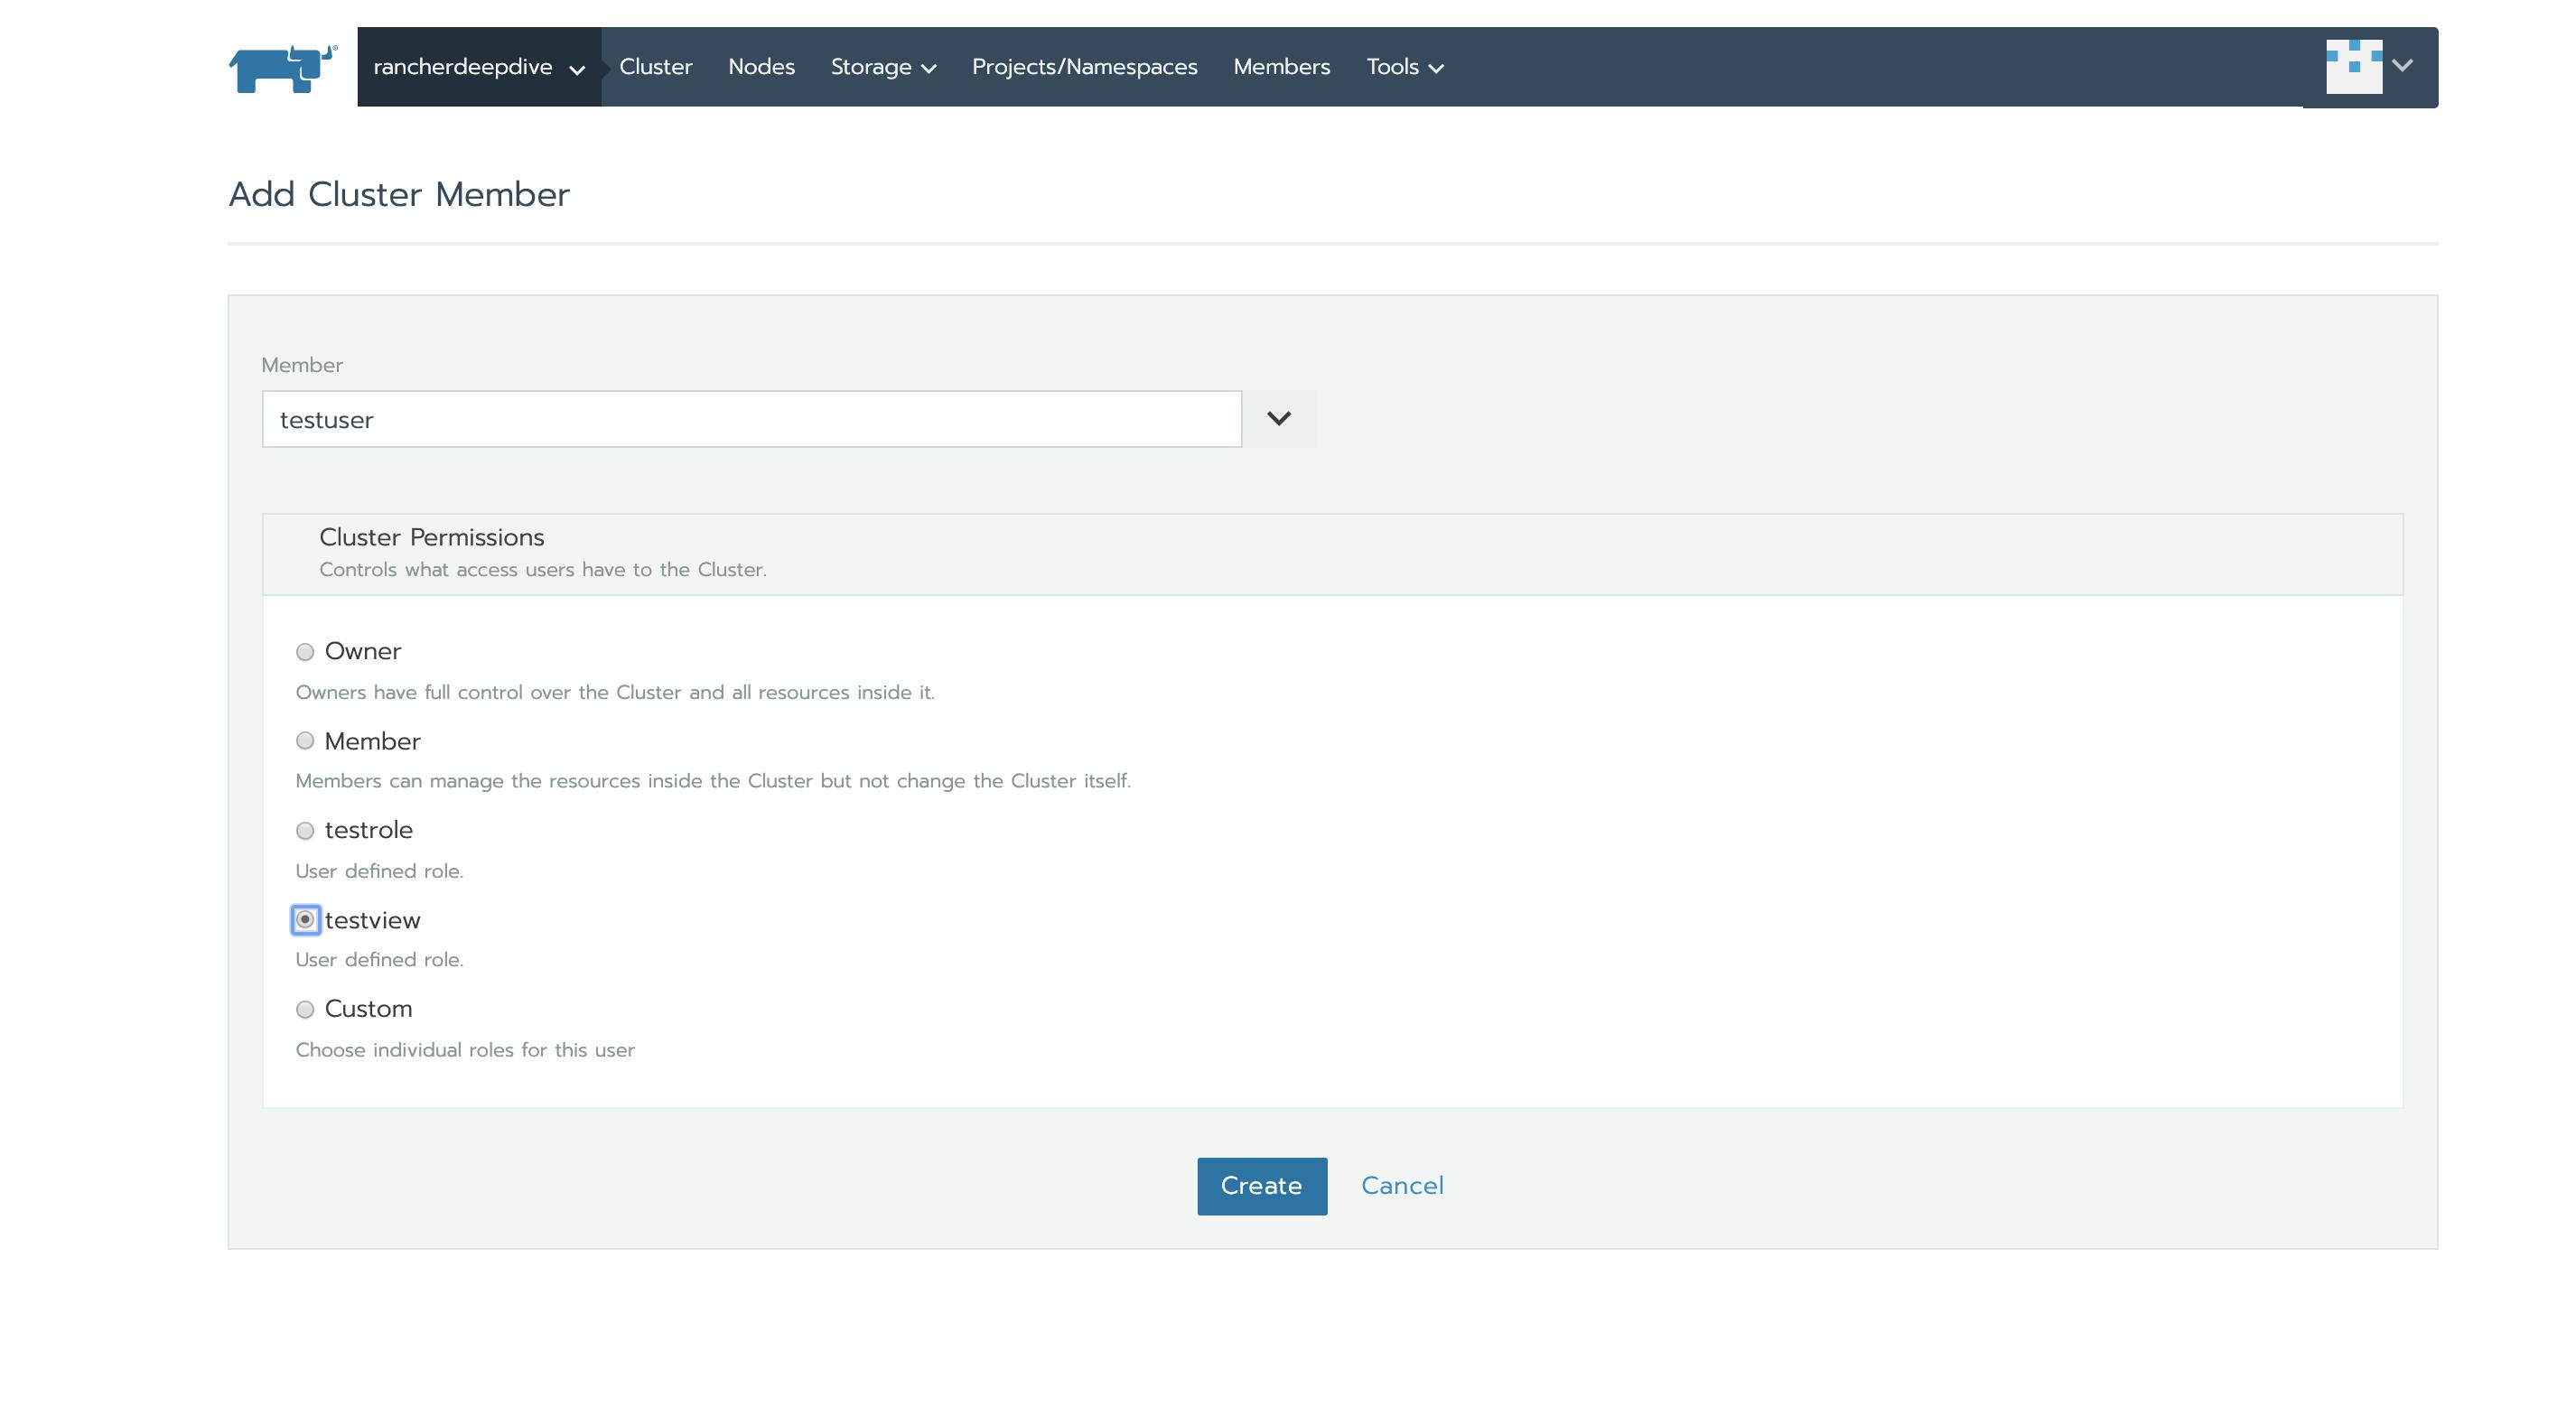 adding a member to cluster
Lets login with “testuser” and try to edit a node.

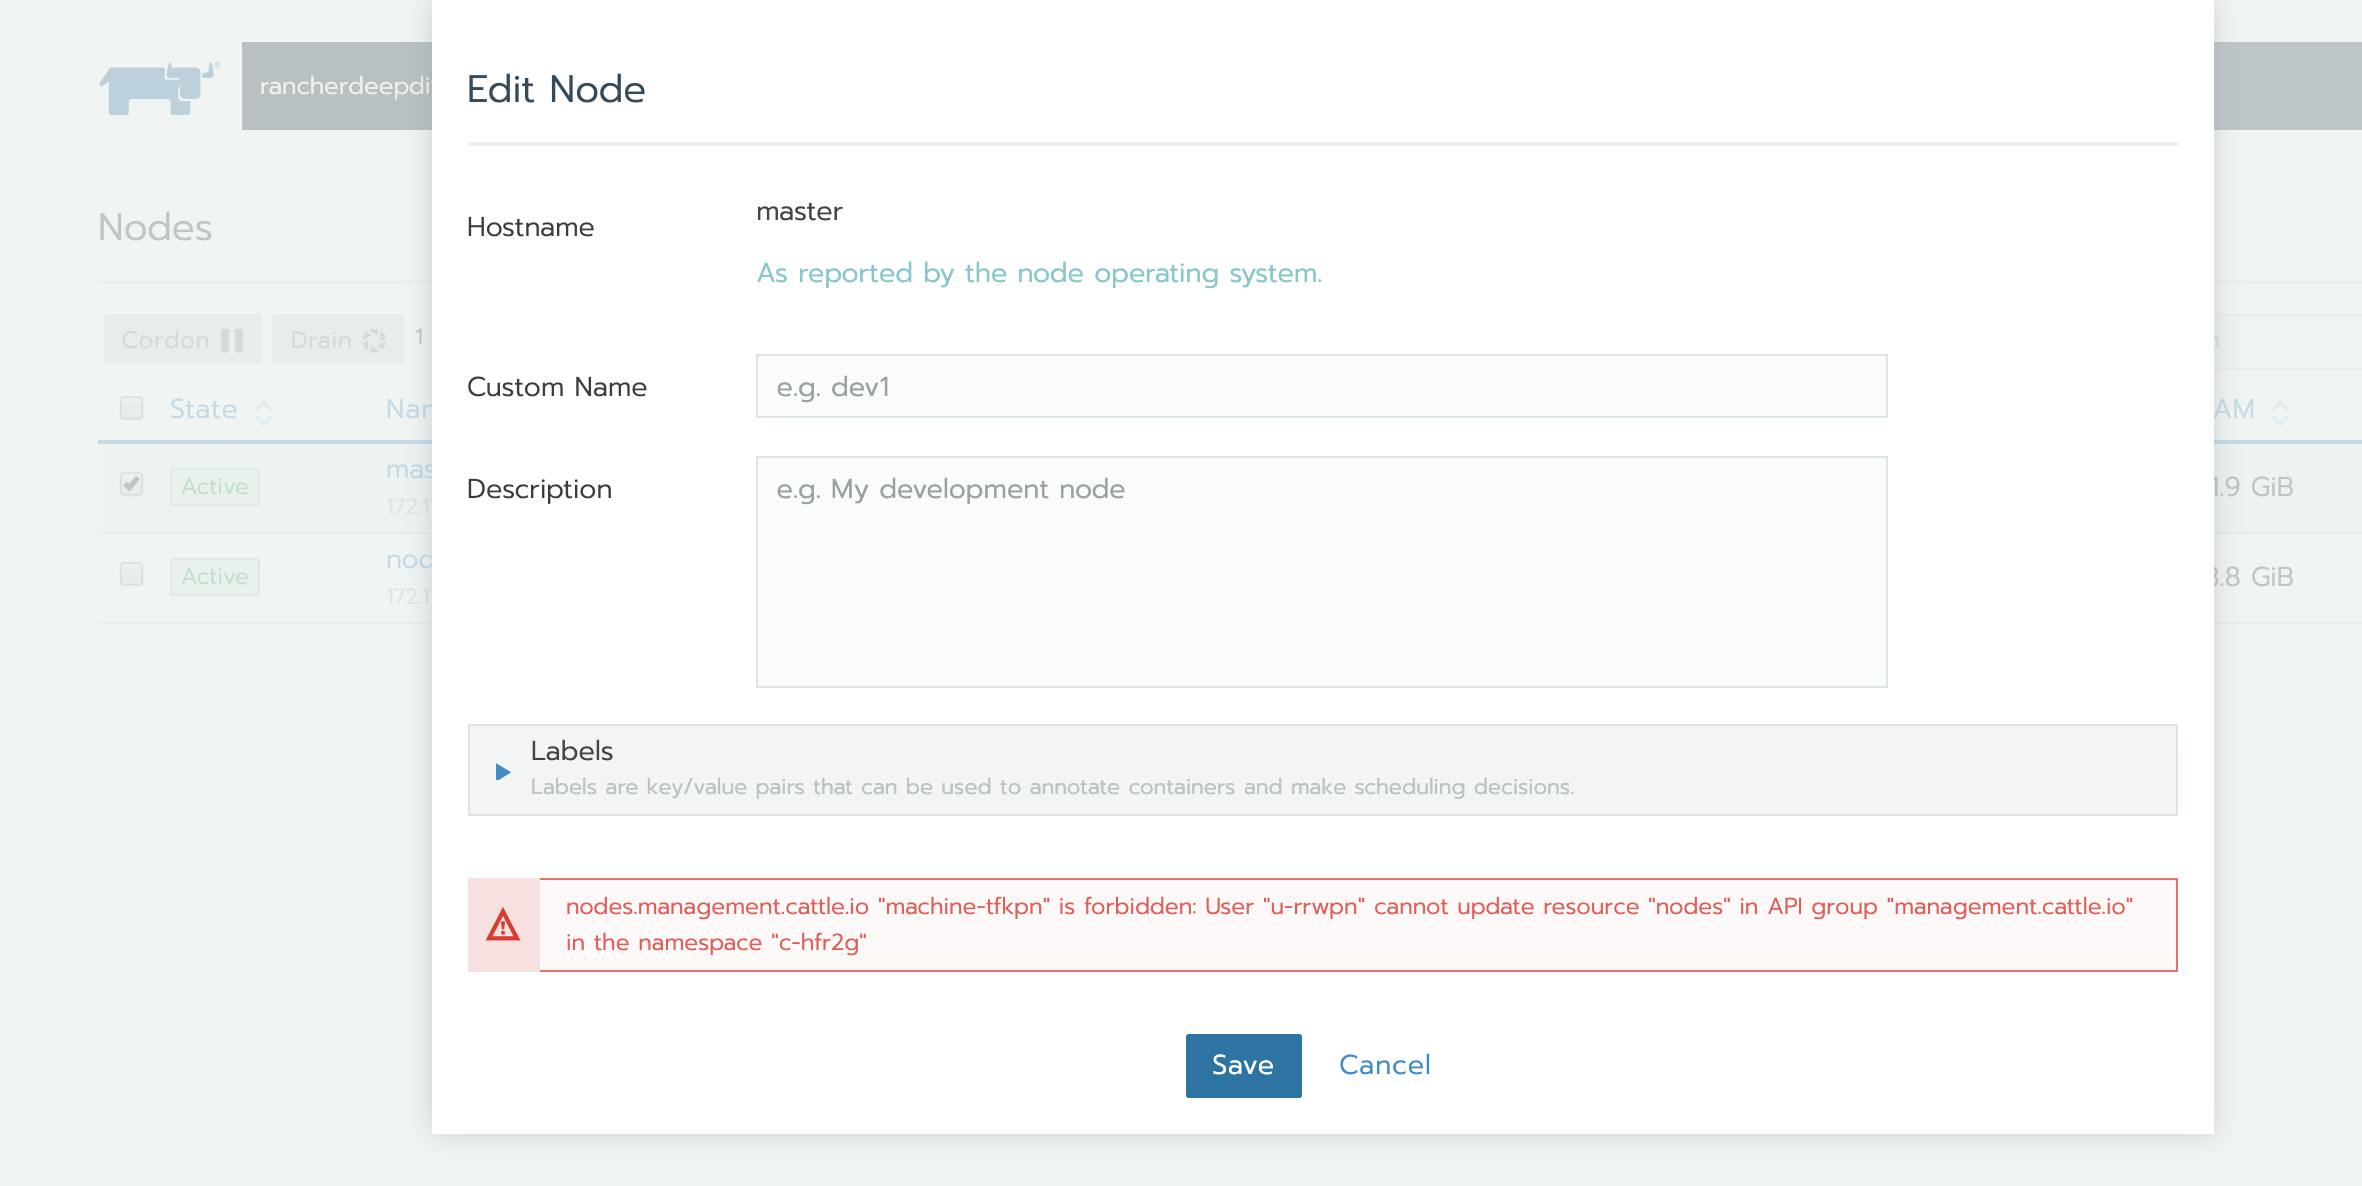 permission error
So we have successfully created a view permission role for the user who can just view what is there in the cluster and cannot modify it in any way.
Different Authentications that can be integrated with rancher :
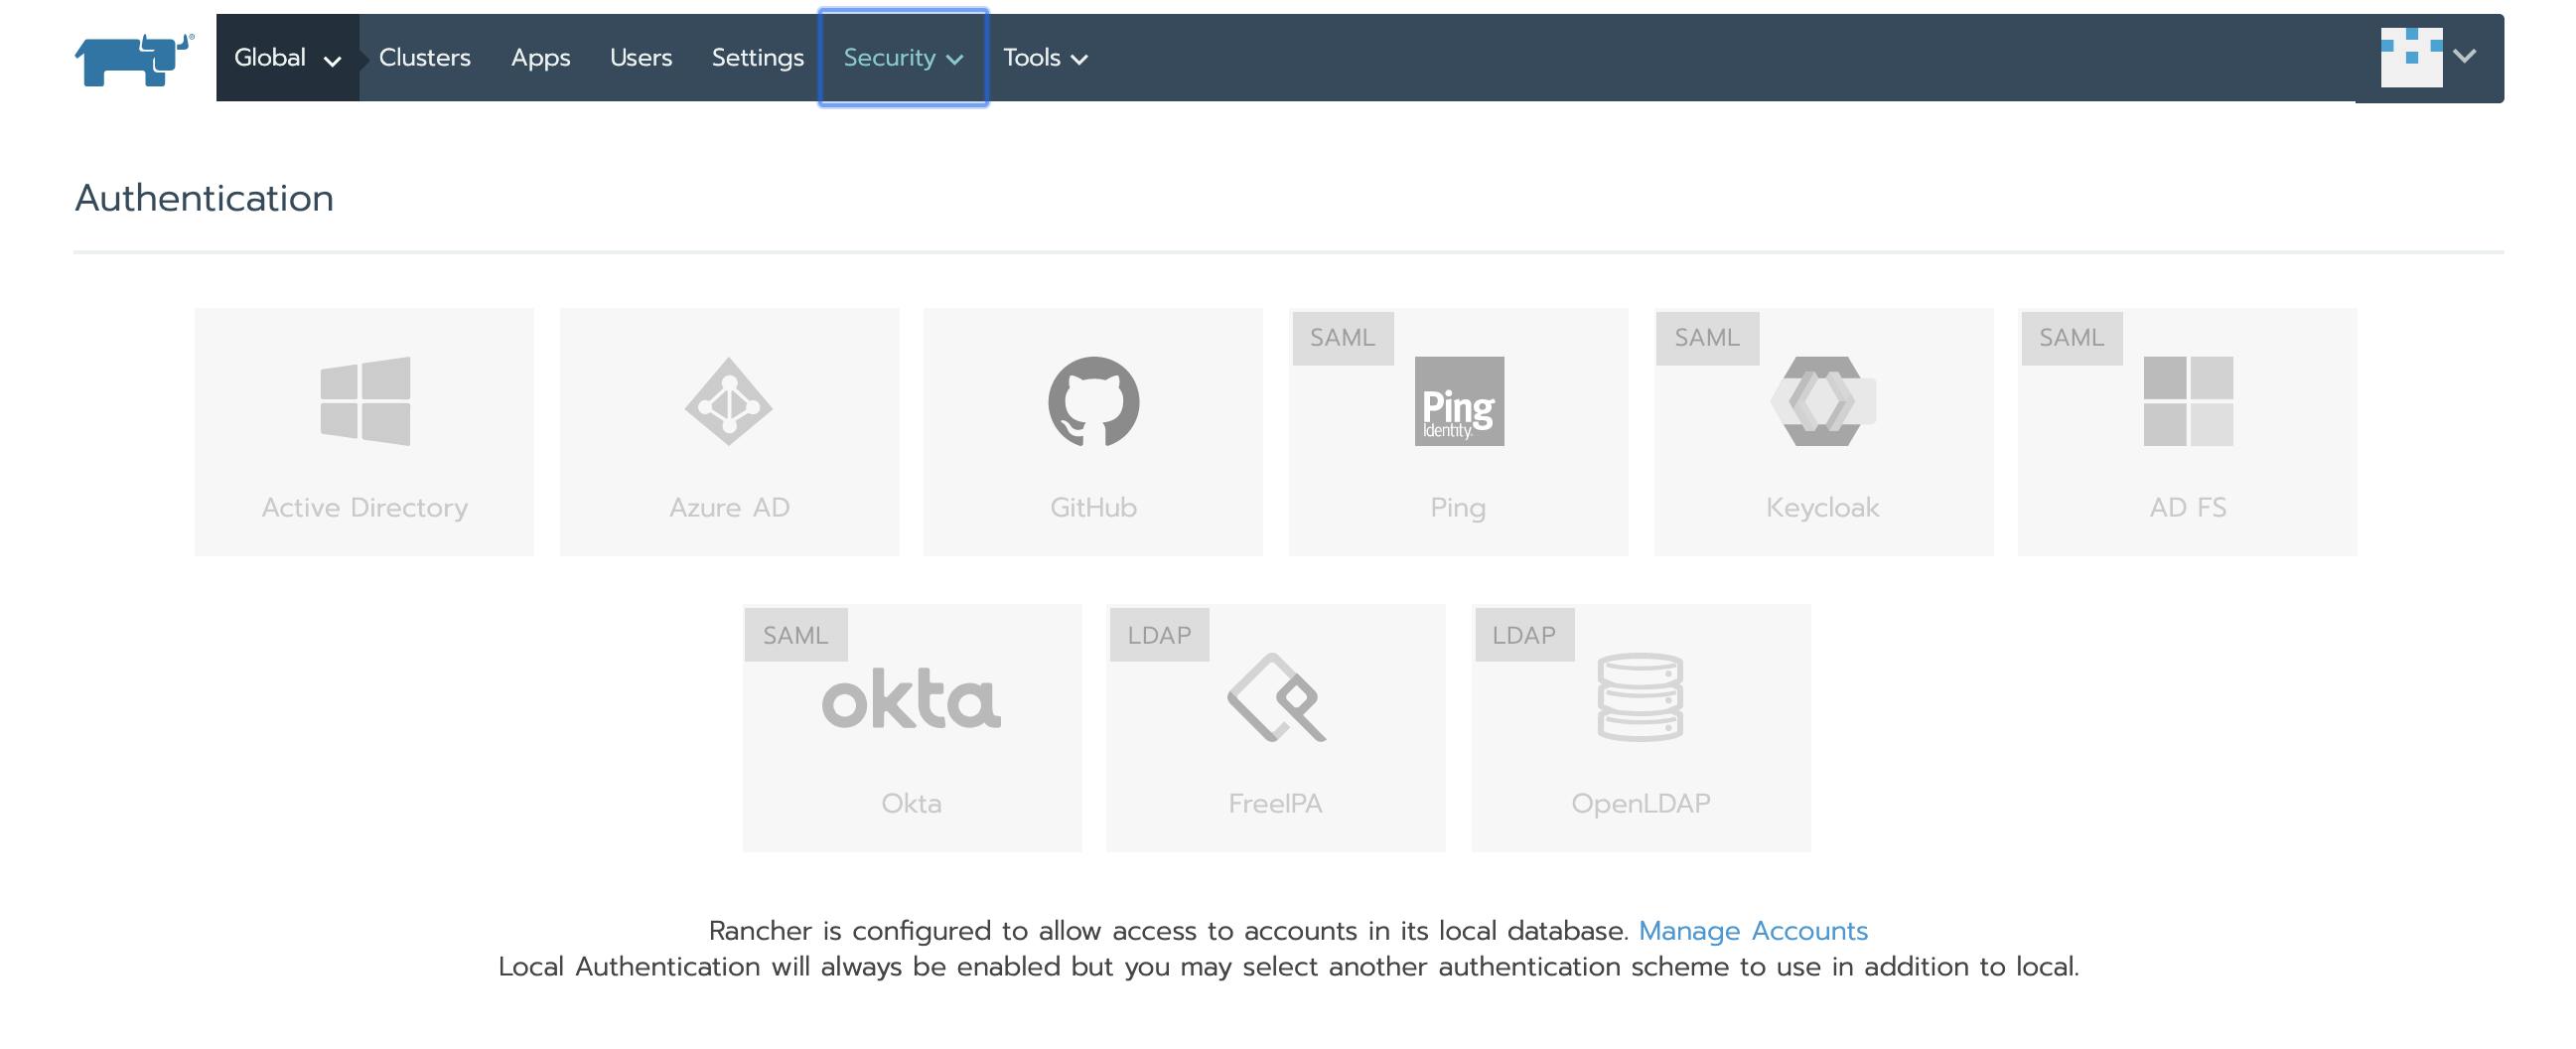 Authentication
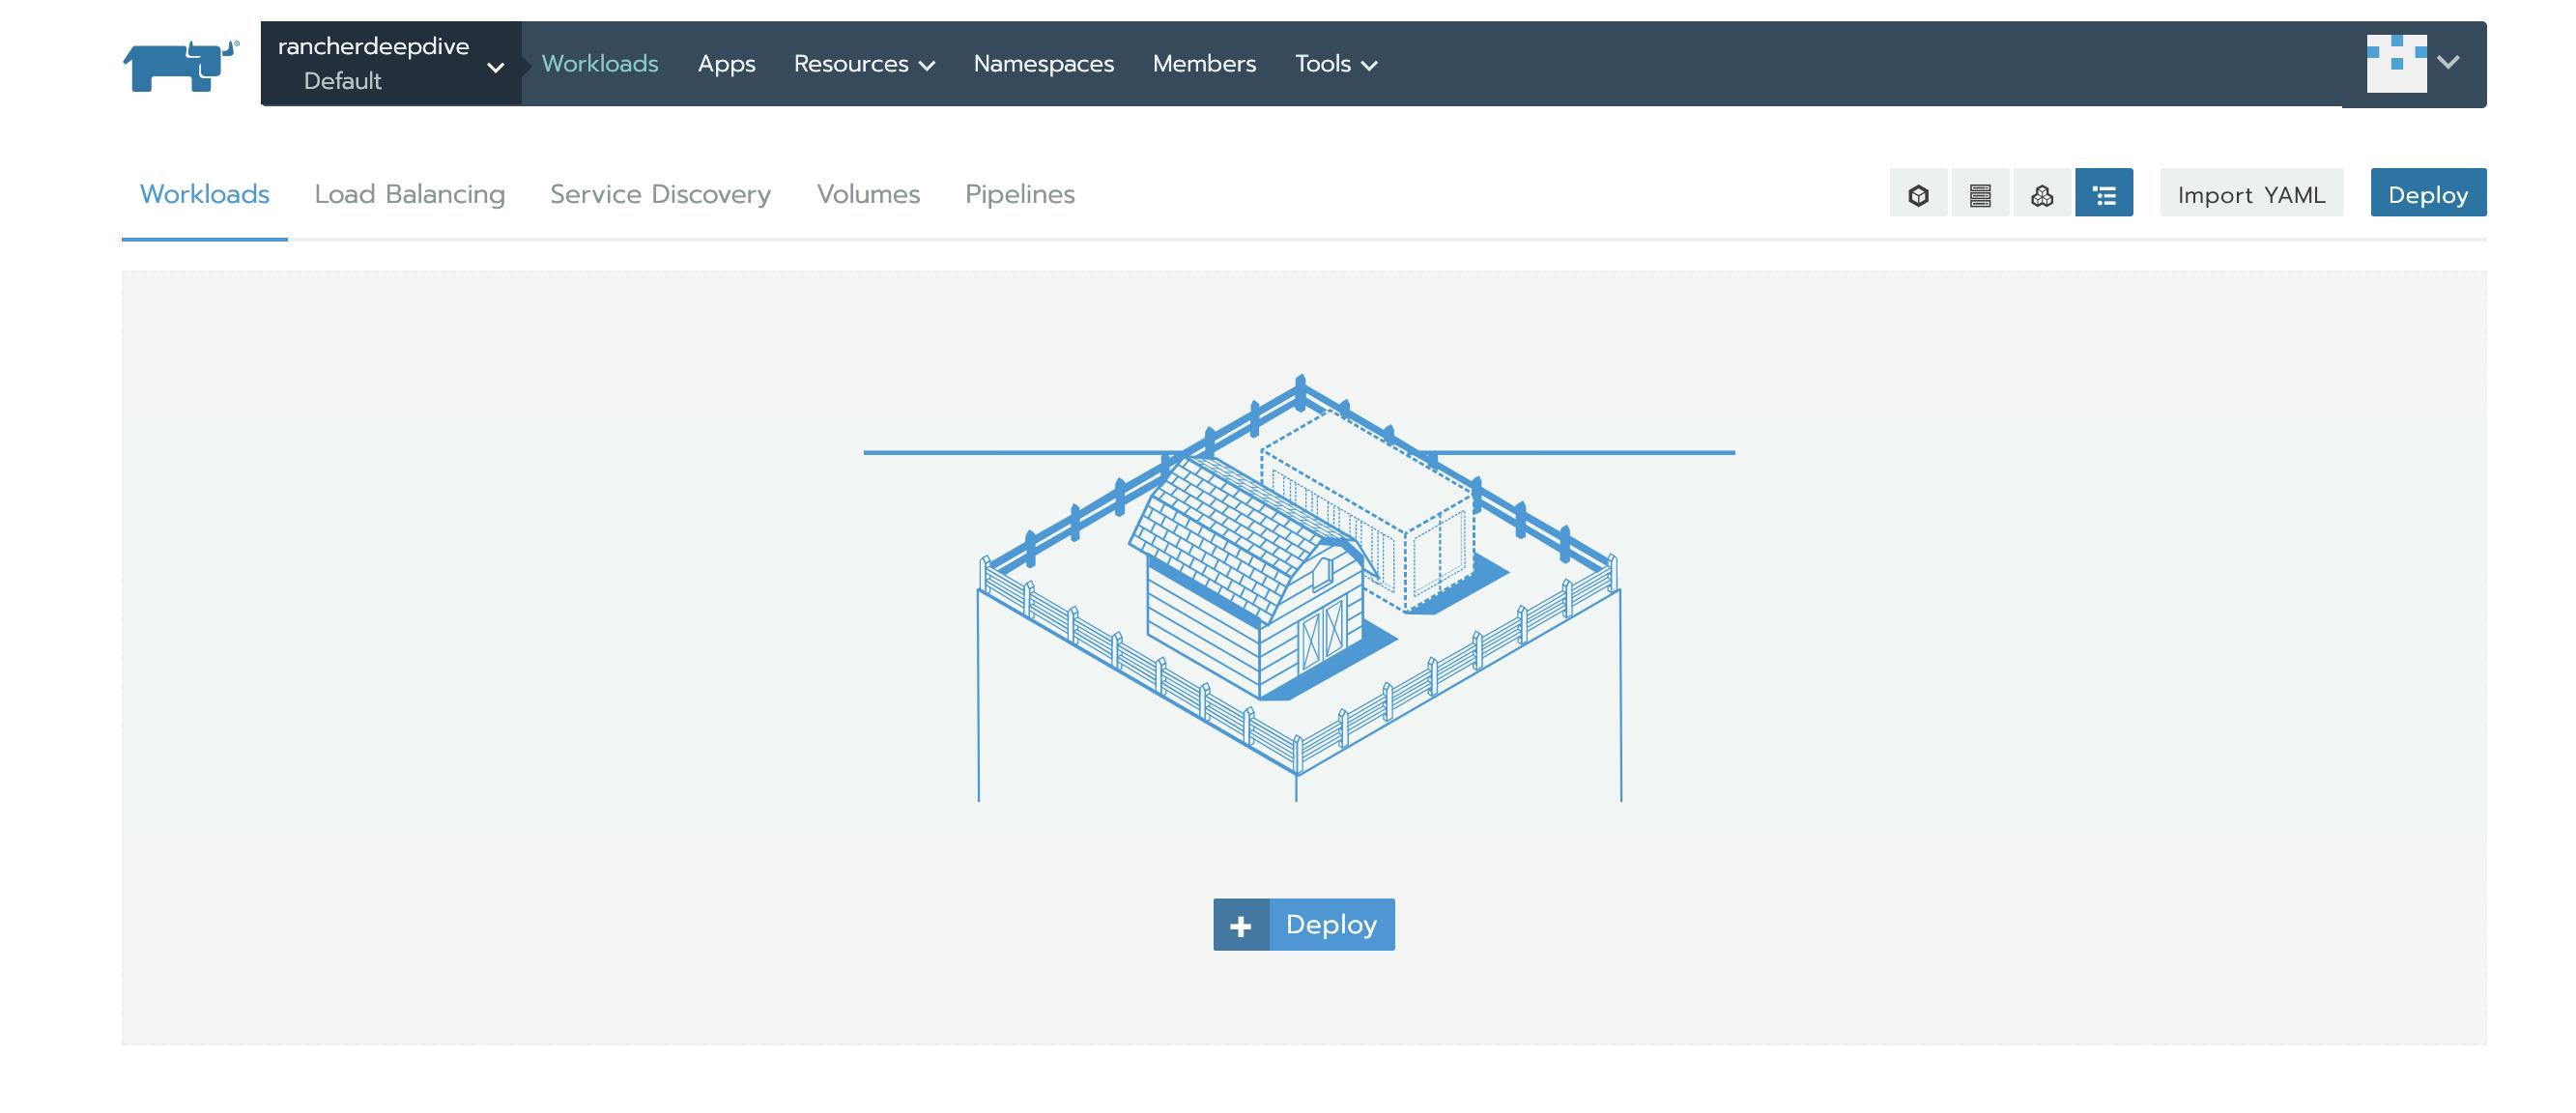
Deployment via Rancher UI: Lets deploy a sample Nginx application from the Rancher UI itself. Choose the default project from the cluster and click deploy. Projects are the upper layer where you can place your namespaces. All the system level namespaces go in the system projects and all other you can put in different sets of projects and these projects can have assigned roles separately. That's the beauty of roles granularity that rancher provides.
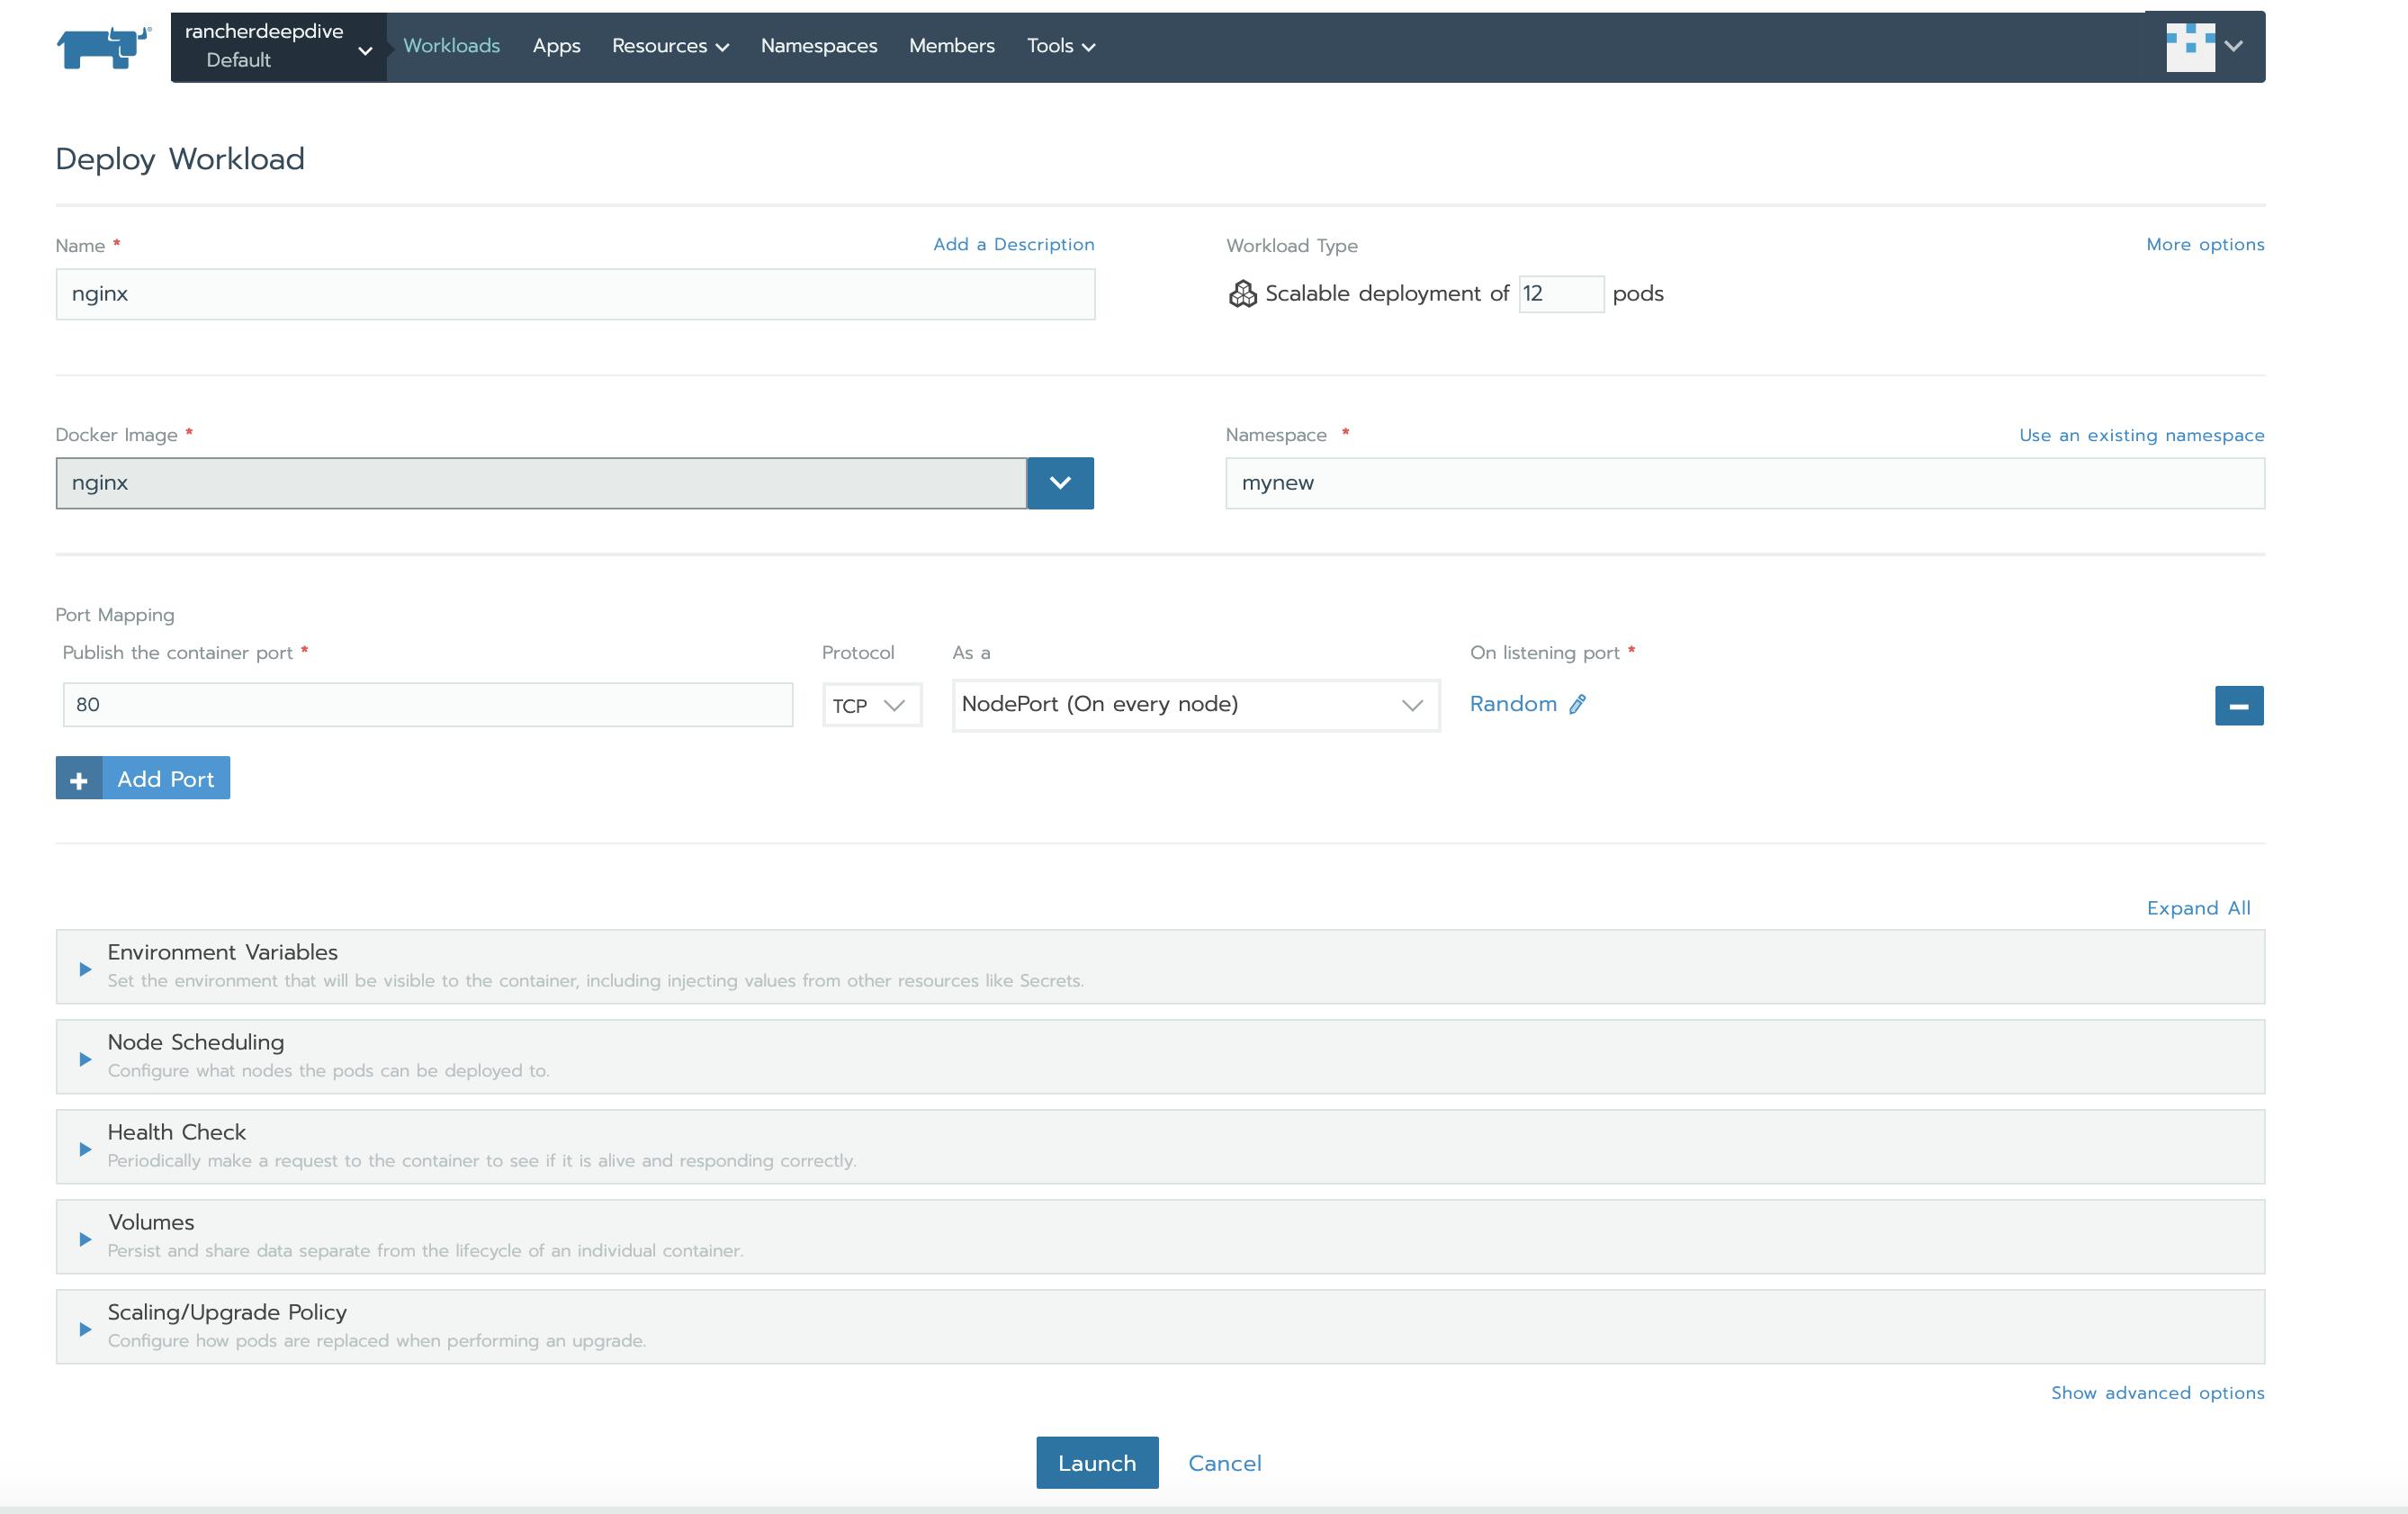


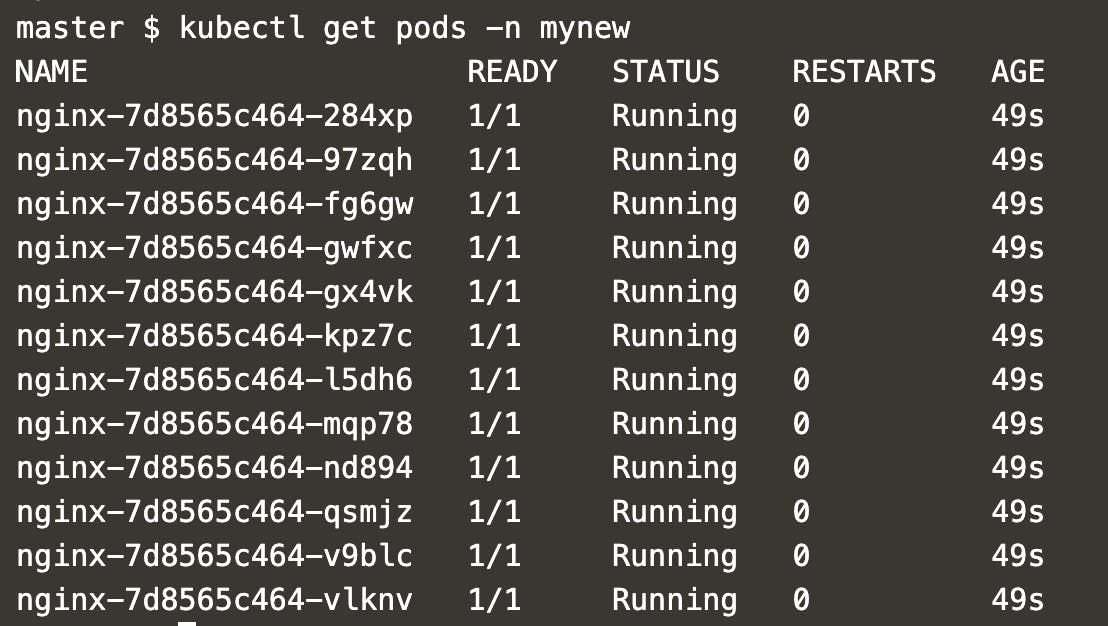
As you can see that we have deployed 12 instances of nginx just by entering a few details. WE can enter further details like :

After the pod is spin up with 12 replicas lets go in the pod and reduce the replicas to 3 and see what other options are available to see its logs, health checks, etc.
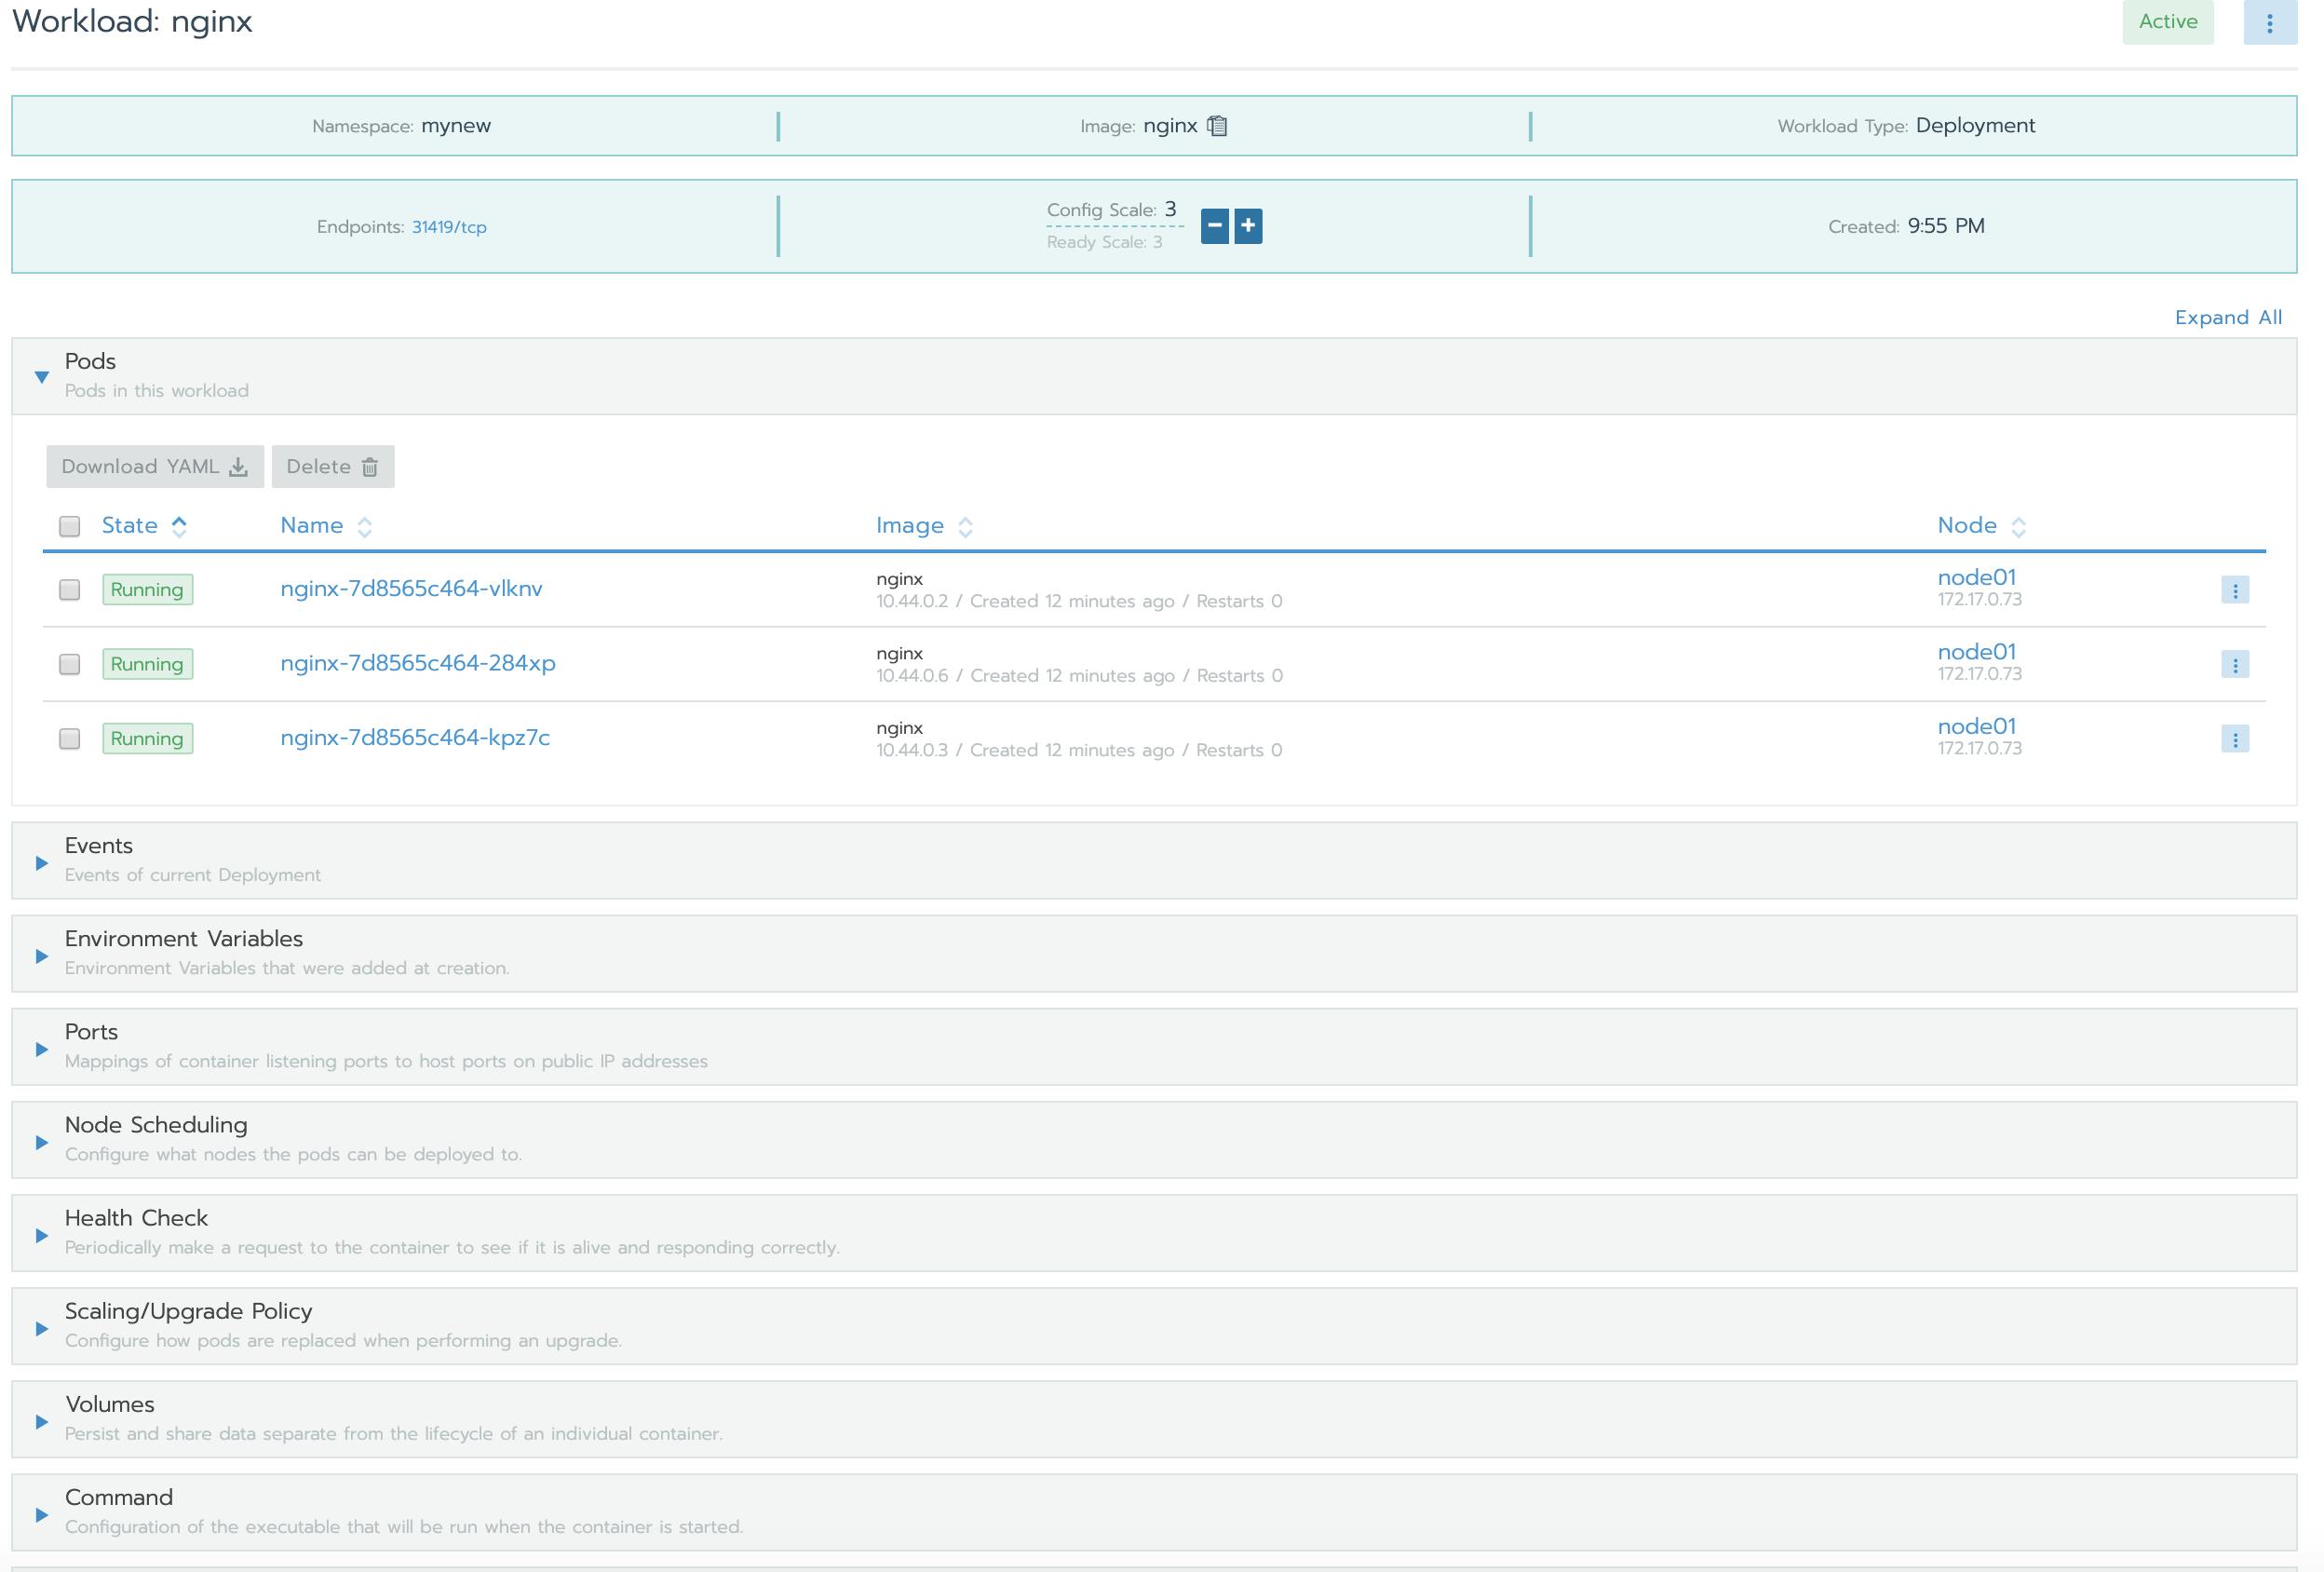 replicas reduced to 3
You can edit/view tha yaml for pods, nodes etc on the live cluster from the rancher UI itself. You can install logging systems as well and install necessary apps fro CI/CD .
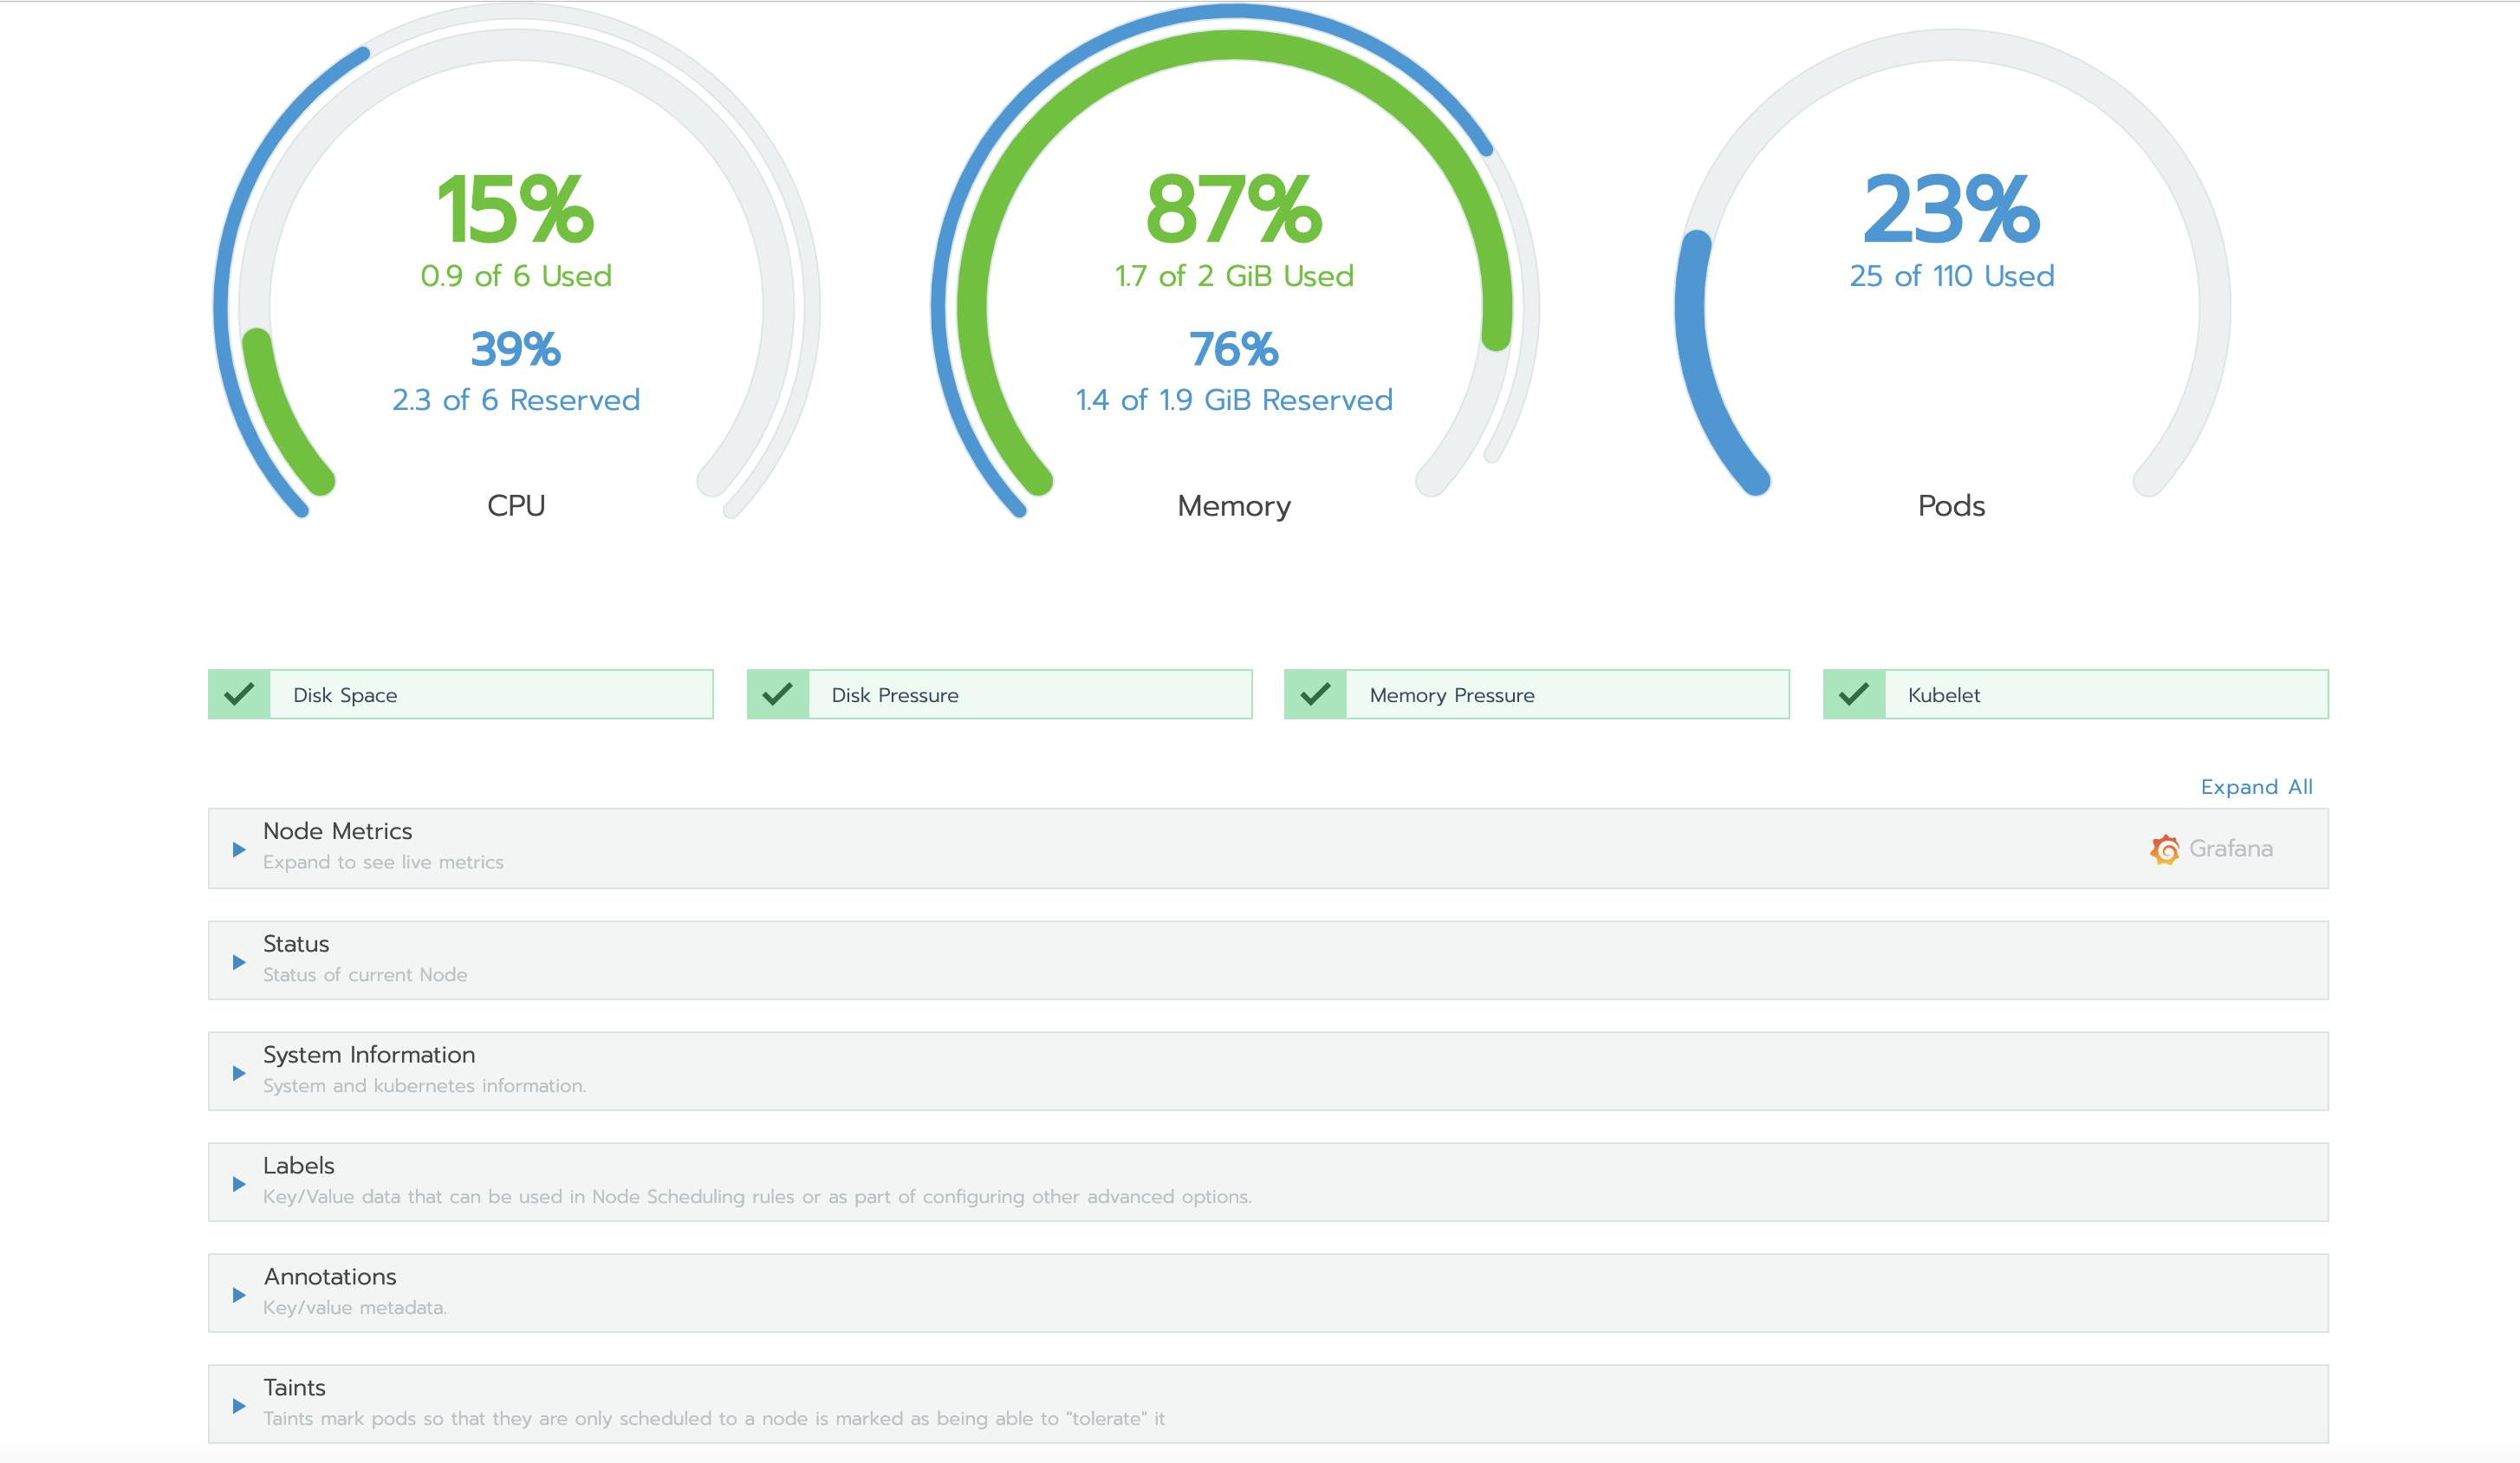 Node Configurations
You can Also launch kubectl shell and perform the command line activities from rancher UI itself. If for some reason the kubectl does not work then download the kubeconfig file and check it if it works. Sometimes the custom certificates used to set up the clusters have to be put in the settings in order to make the kubectl shell work properly.
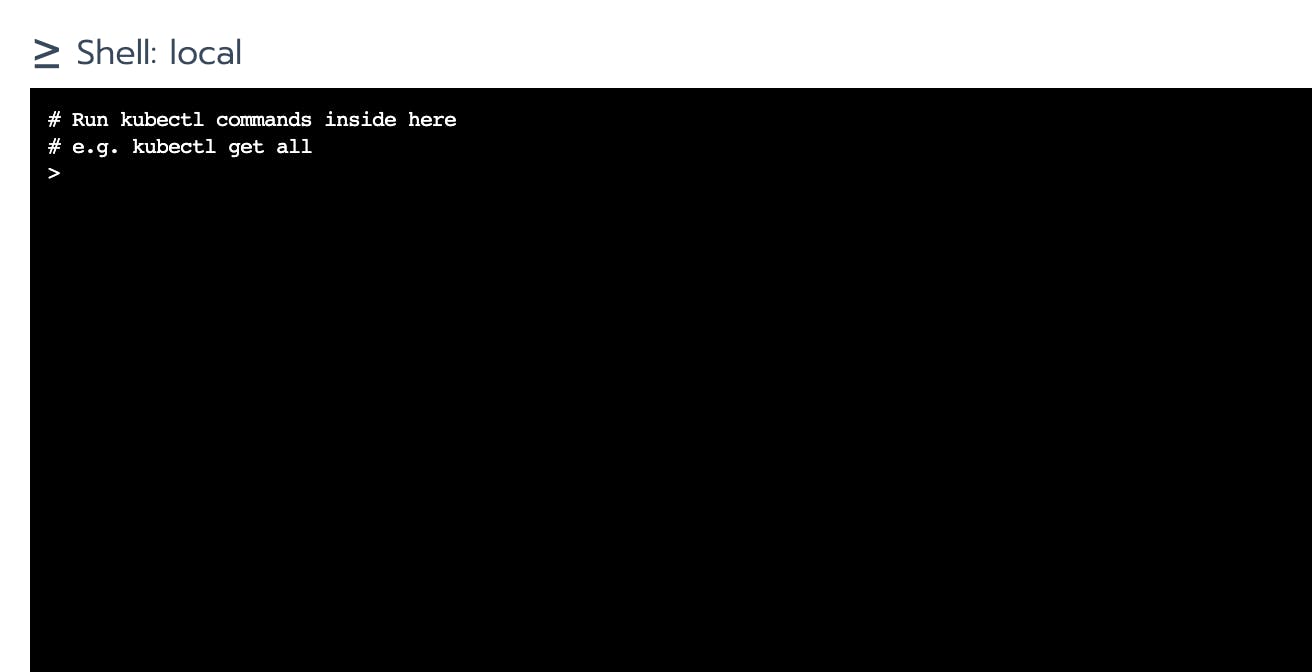 local cluster shell
Customizing Rancher UI : If you want to customize rancher UI then clone the rancher/UI repository. Build it locally and point it to the server running for the local development. Once it is set. Run it on a server and change the UI index URL setting in the server pointing to the new UI. Git repository. : https://github.com/rancher/ui
All in All, you can do lots and lots of stuff using Rancher UI . Whatever we have discussed throughout the article is just a little explanation of some common things.
Recap: Things covered in this Article -
- Kubernetes playground cluster creation
- Launching Rancher Server
- Importing a Cluster
- Monitoring Concepts
- Grafana Dashboards
- Common monitoring enabling issues
- User Creation
- Role Creation
- Adding a member to the cluster
- Authentication
- Deployment via Rancher UI
- Playing with pod replicas
- Node Configurations
- Kubectl shell
- How to customize rancher UI
Happy Ranchering.!!
Saiyam Pathak https://www.linkedin.com/in/saiyam-pathak-97685a64/ https://twitter.com/SaiyamPathak

